User Group Management
This section describes how to manage user groups, including creating user groups, deleting user groups, renaming user groups, adding child user groups, adding users to user groups, and removing users from user groups. The user group management page is shown below.
Create a User Group
On the user group page, click Create User Group in the upper-right corner. A new user group appears in the user group list on the left. Rename it and save the change to create the user group, as shown below.
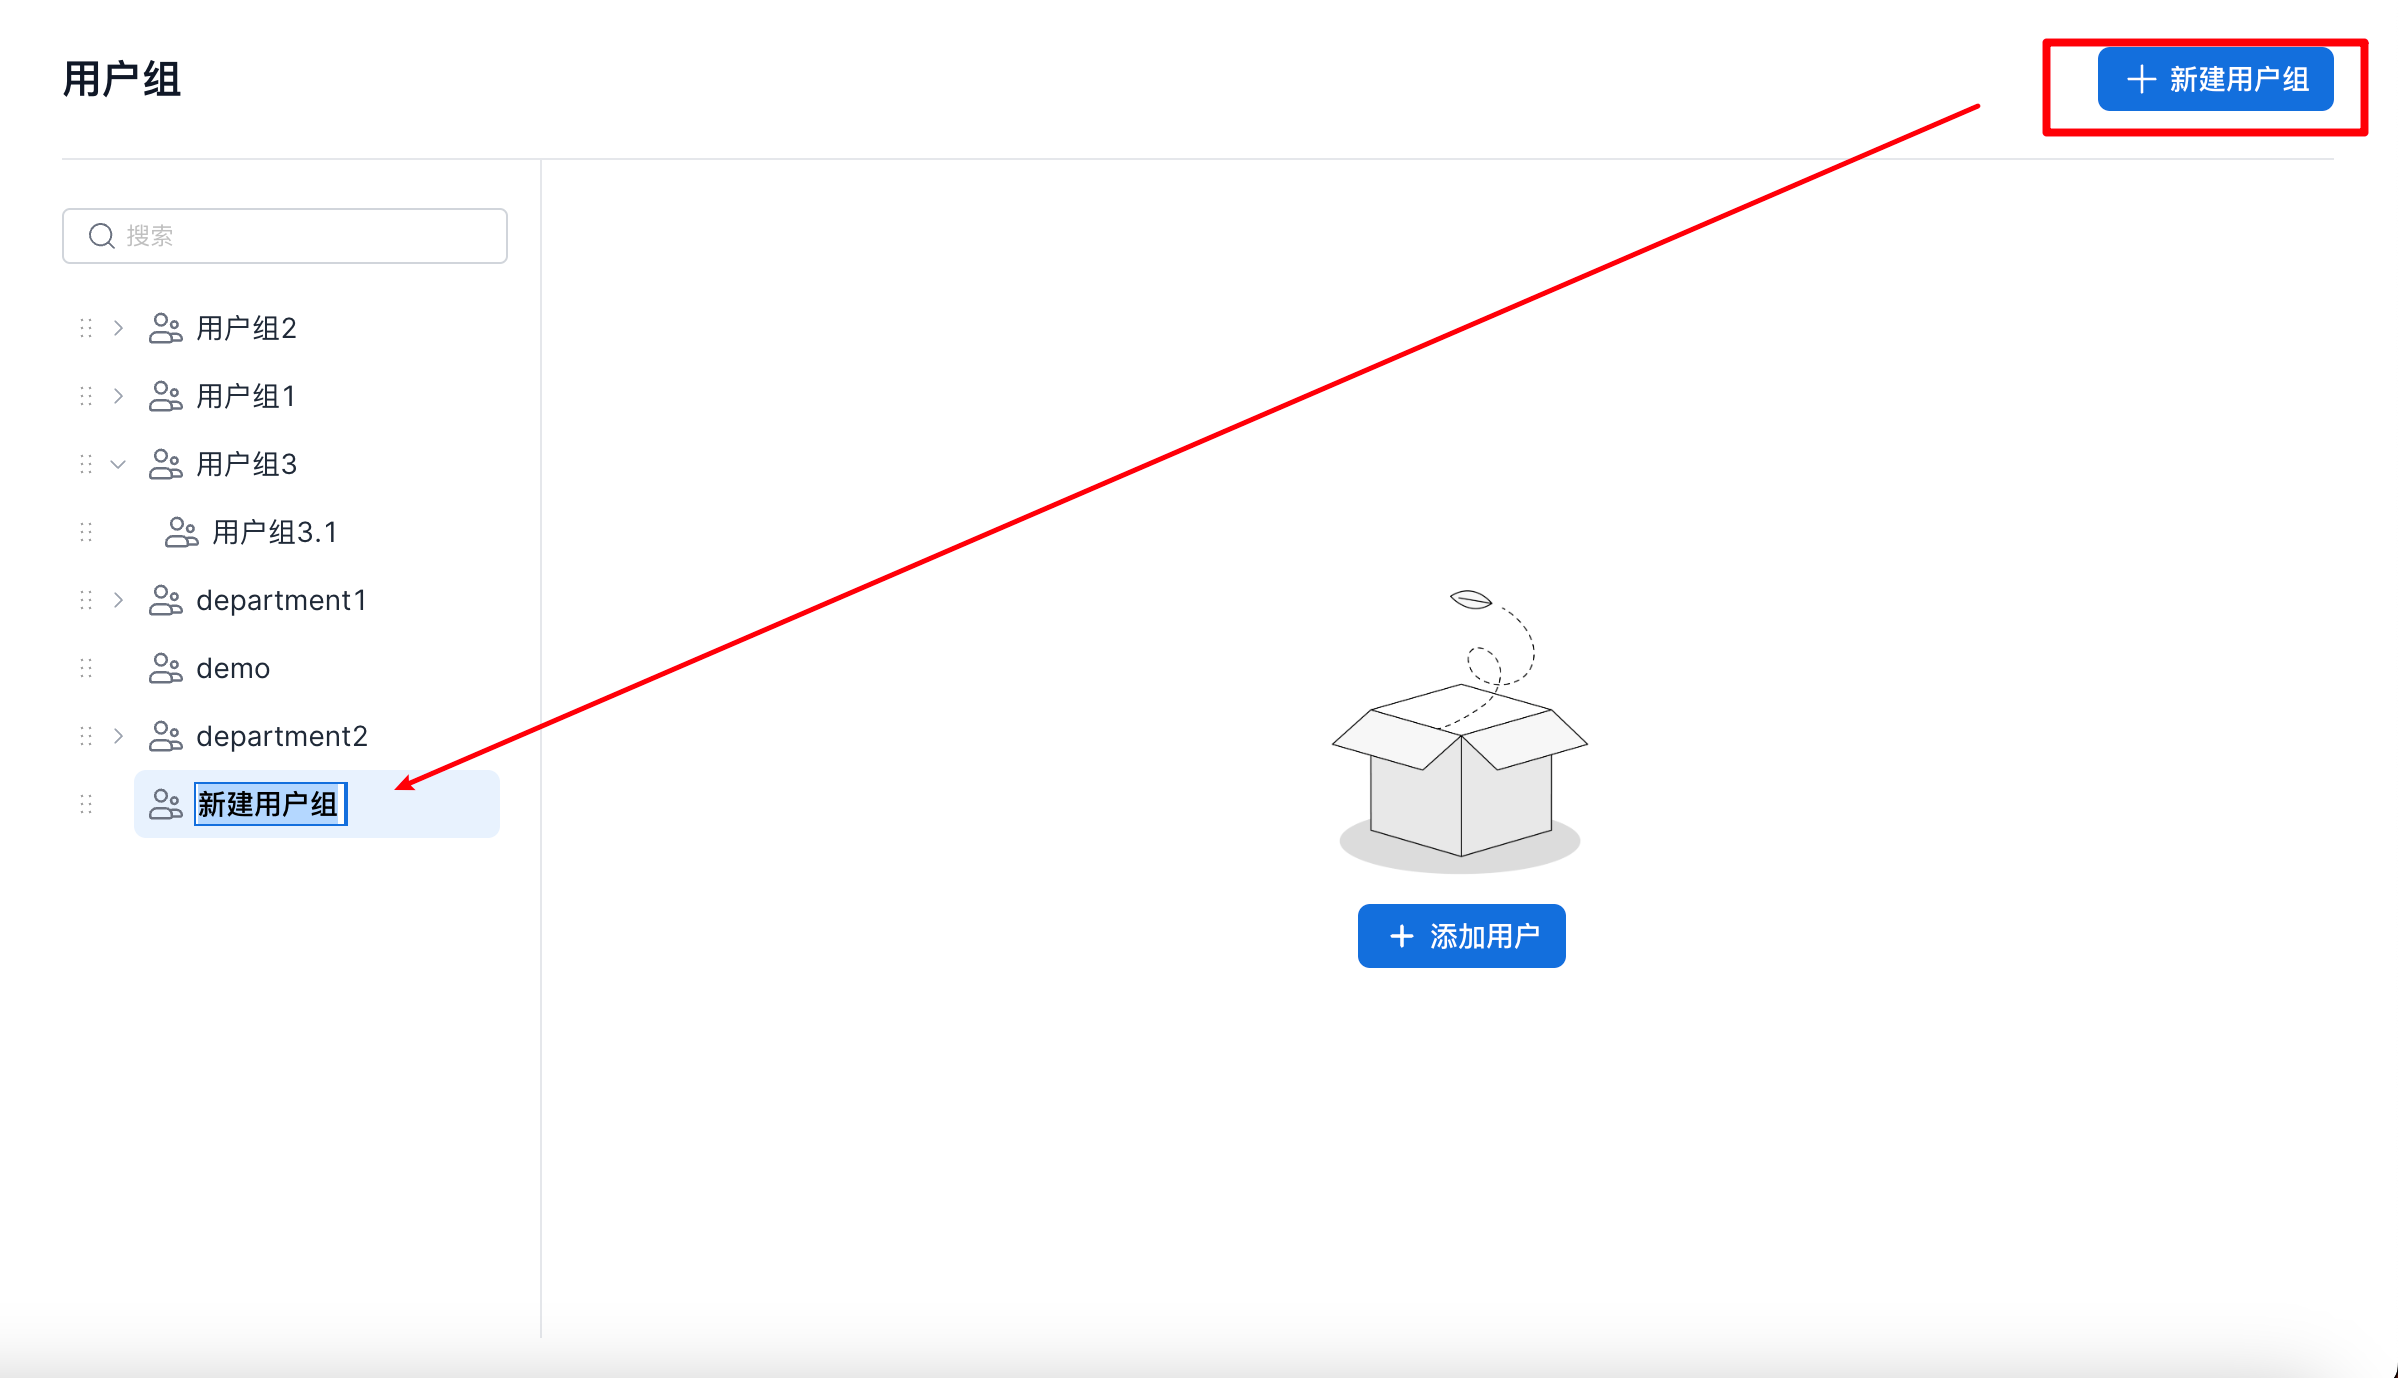
When creating a user group, you can also click Add User to add specified users to the group.
Synchronize User Groups
Prerequisite
Users must be synchronized to ALoudata CAN first.
Enable User Group Synchronization
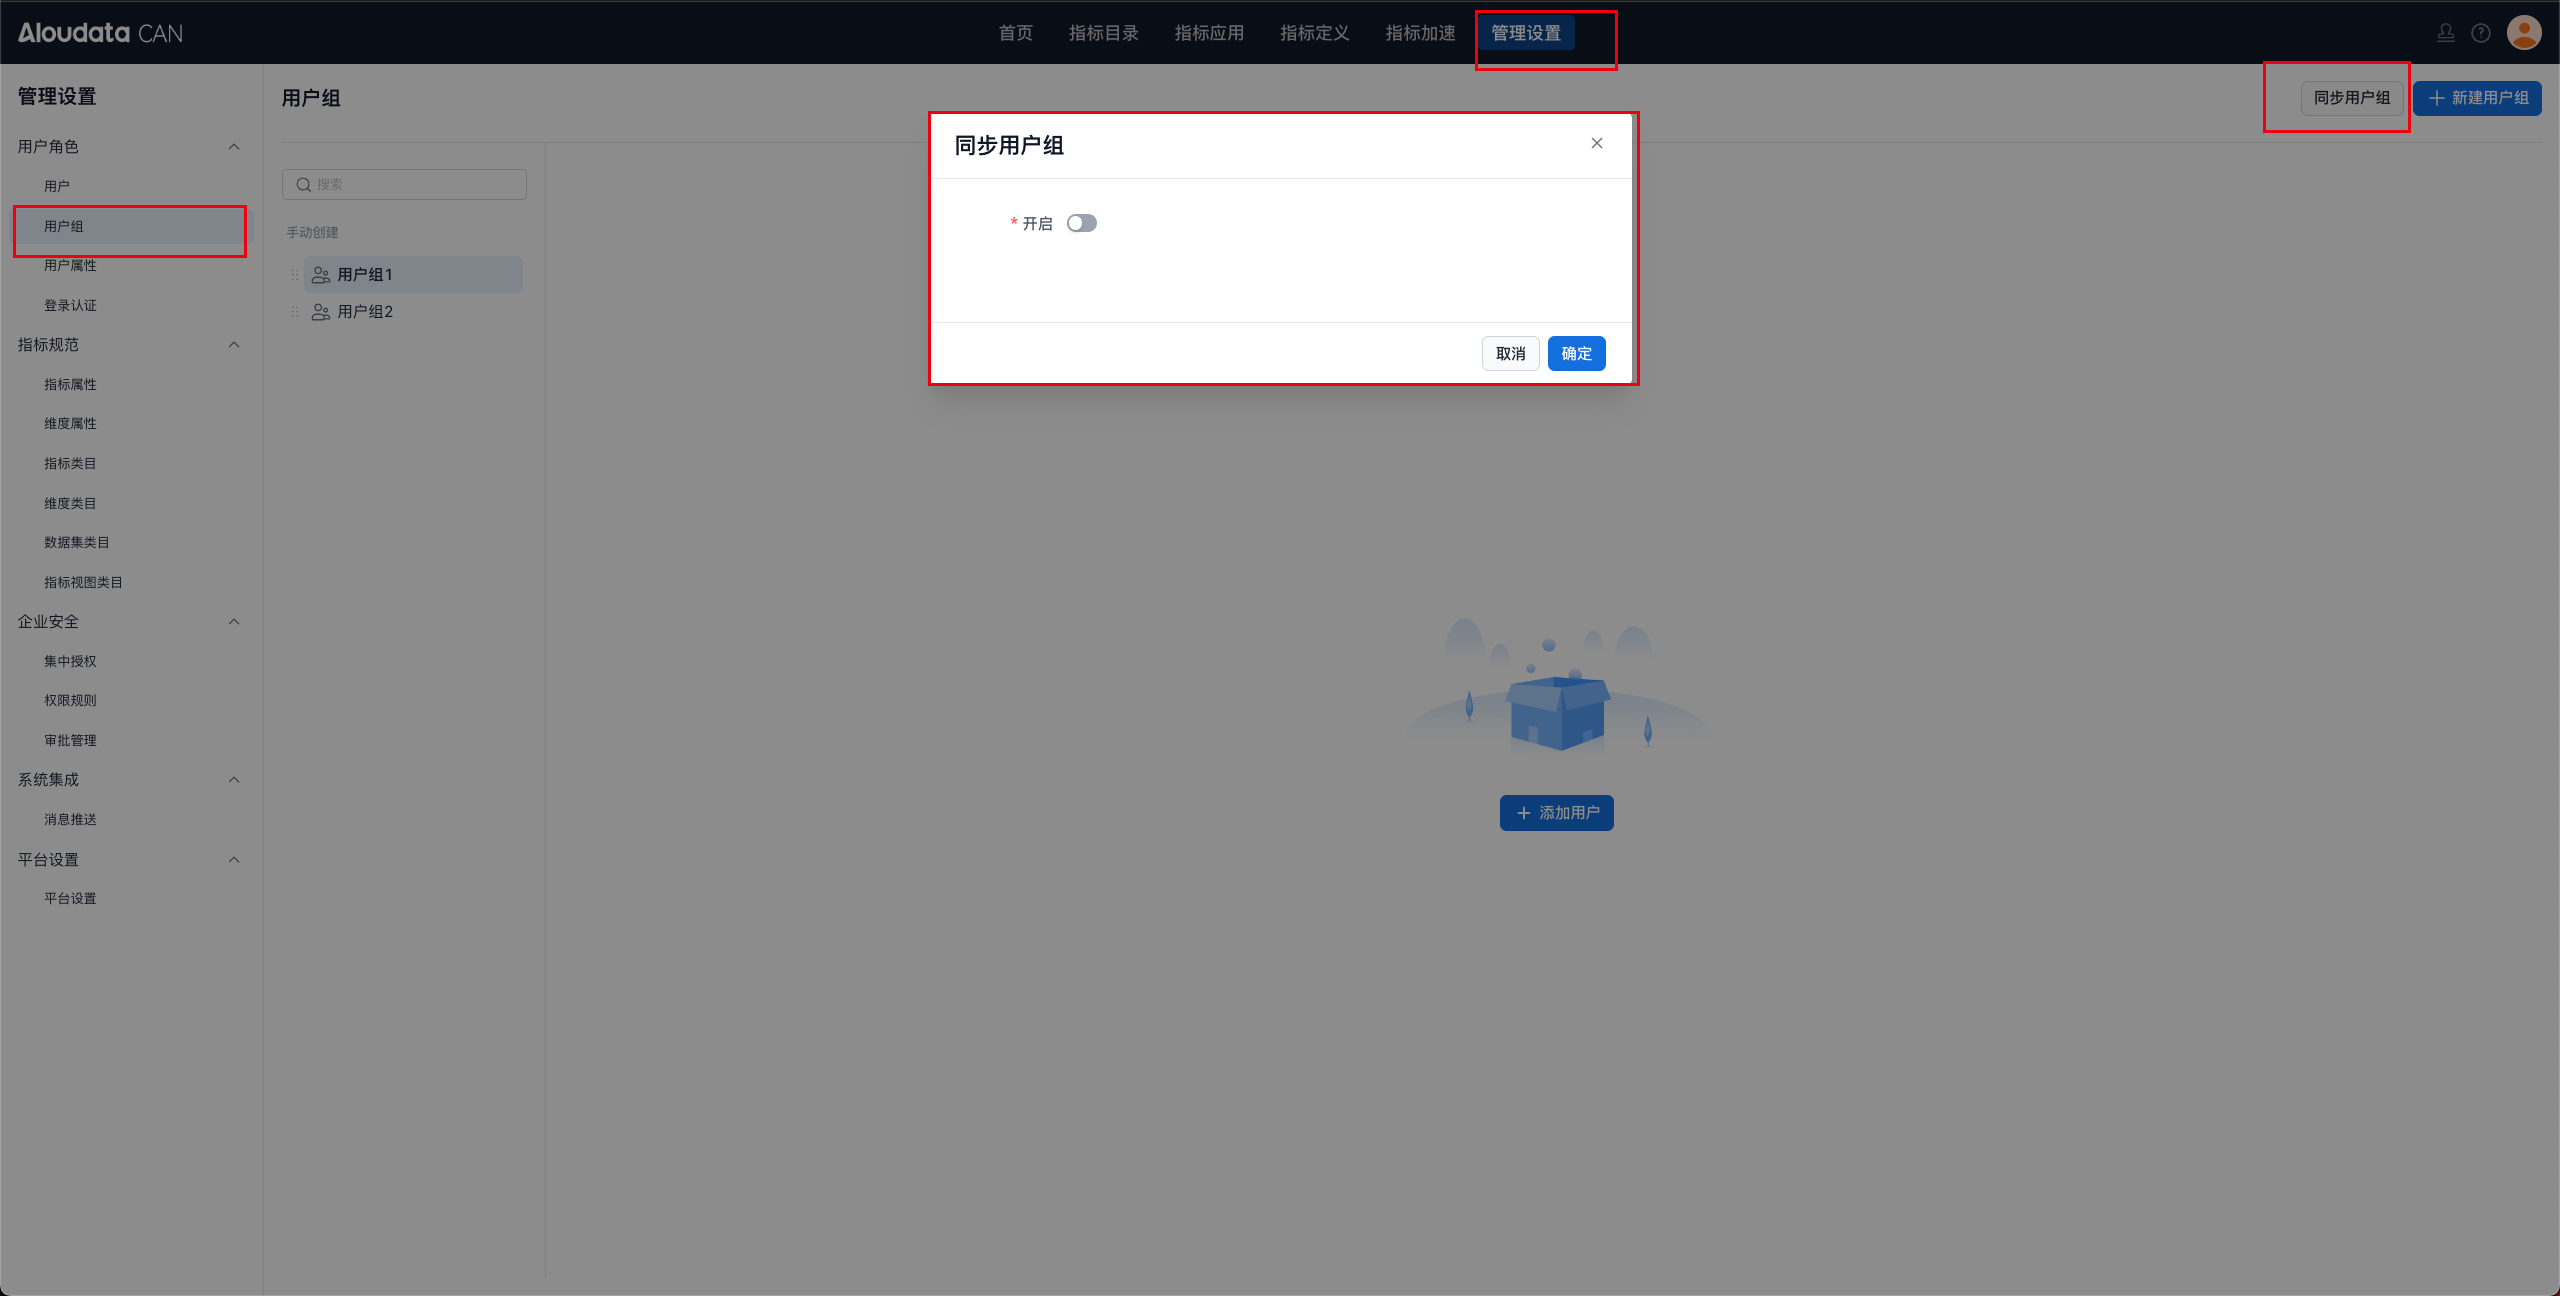
In the top navigation bar, select Management Settings. In the left navigation menu, select User Roles > User Groups. On the user group page, click Synchronize User Groups in the upper-right corner, and then click Enable in the dialog.
Configure User Group Synchronization
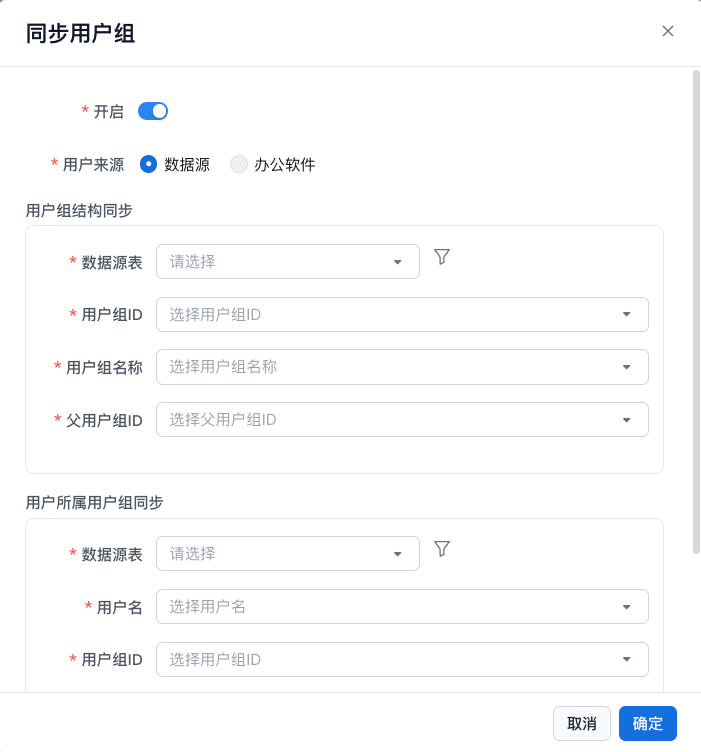
User Group Structure Synchronization
| Configuration Item | Description |
|---|---|
| Data Source Table | Select the user group table to synchronize from the bound data source. |
| User Group Table Data Filter | Click the button on the far right of the data source table field, and then filter data in the dialog. |
| User Group ID | Map to the user group ID in the user group table. |
| User Group Name | Map to the user group name in the user group table. |
| Parent User Group ID | Map to the parent user group ID in the user group table. |
User-to-Group Membership Synchronization
| Configuration Item | Description |
|---|---|
| Data Source Table | Select the user group table to synchronize from the bound data source. |
| User Membership Data Filter | Click the button on the far right of the data source table field, and then filter data in the dialog. |
| Username | Map to the username in the user membership table. |
| User Group ID | Map to the user group ID in the user membership table. |
Synchronization Settings
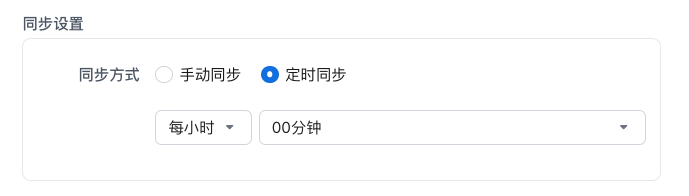
For manual synchronization, click Sync Now to start synchronization.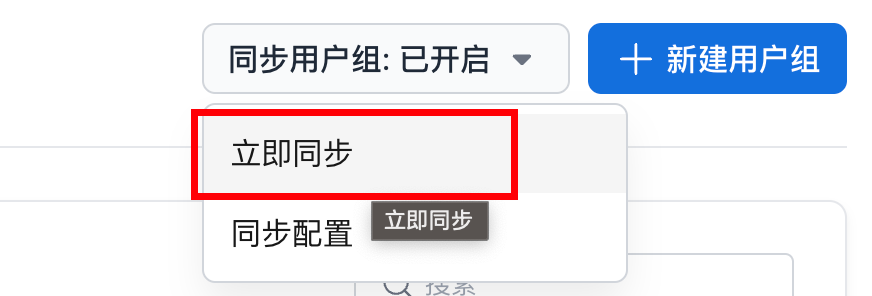 Scheduled synchronization.
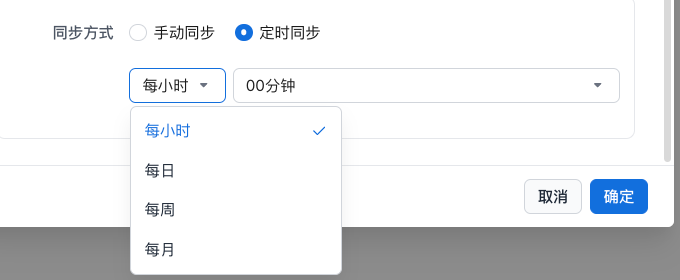 |
Hourly: At minute N of every hour. Daily: At hour N and minute N every day. Weekly: On weekday N at hour N and minute N. Monthly: On day N of every month at hour N and minute N. |
|---|---|
Delete a User Group
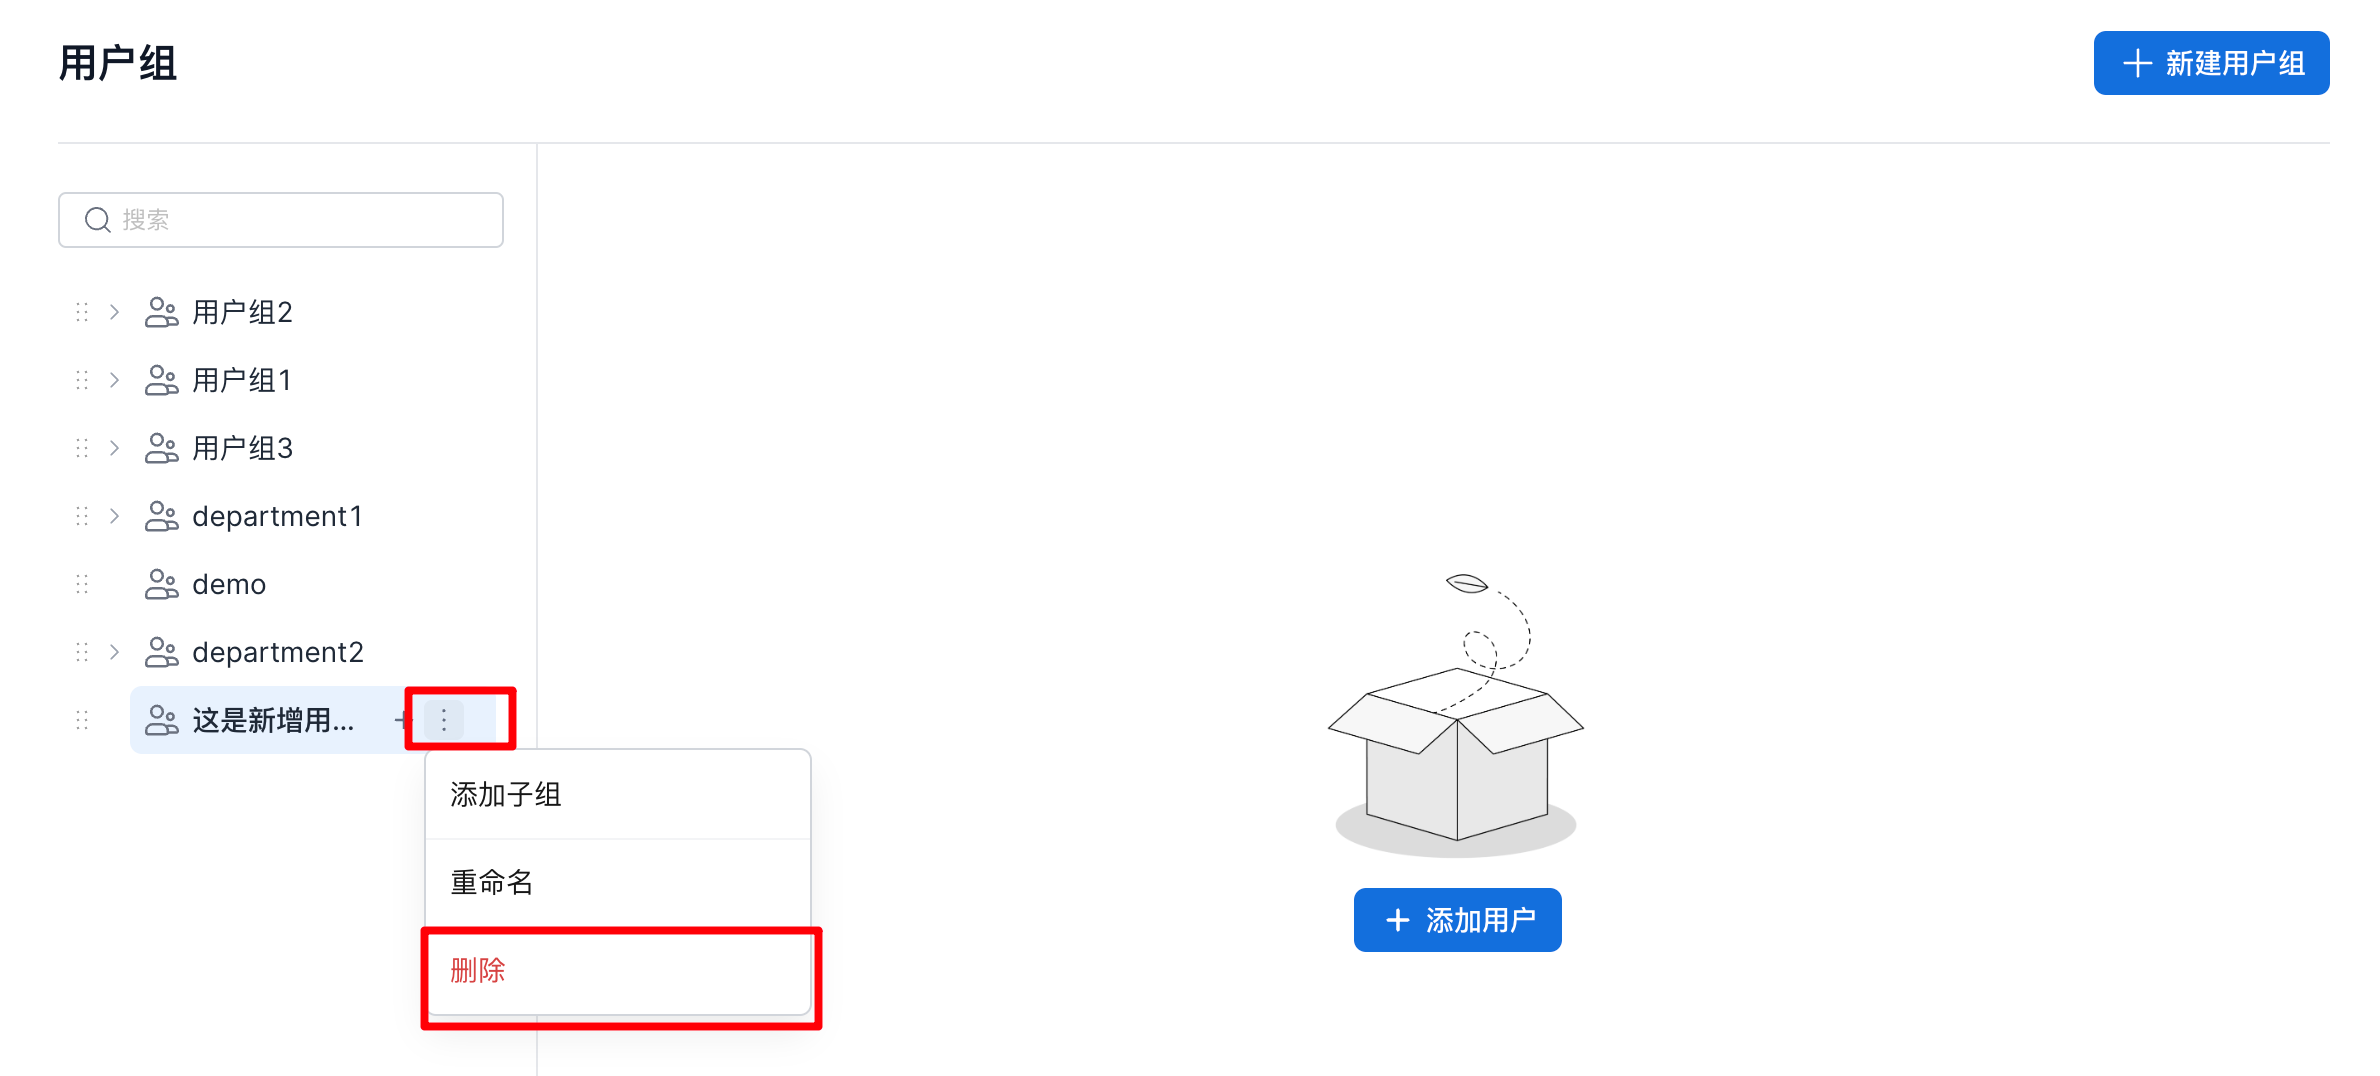
- On the user group page, select the target user group from the user group list. On the right side, click the
...button and select Delete, as shown below.
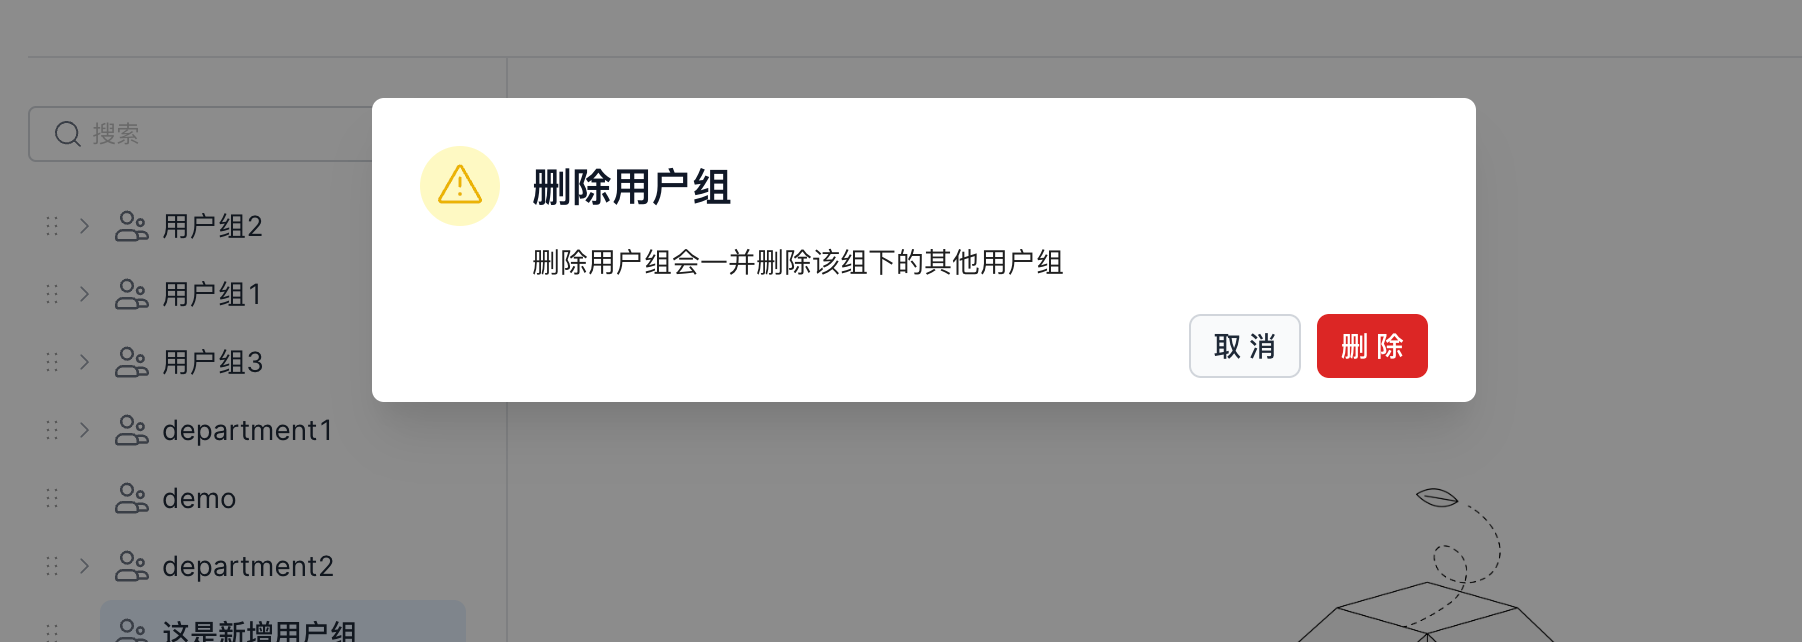
- In the delete dialog, click Confirm to delete the user group, as shown below.
Note
As described in the delete dialog, deleting a user group also deletes its child user groups.
Rename a User Group
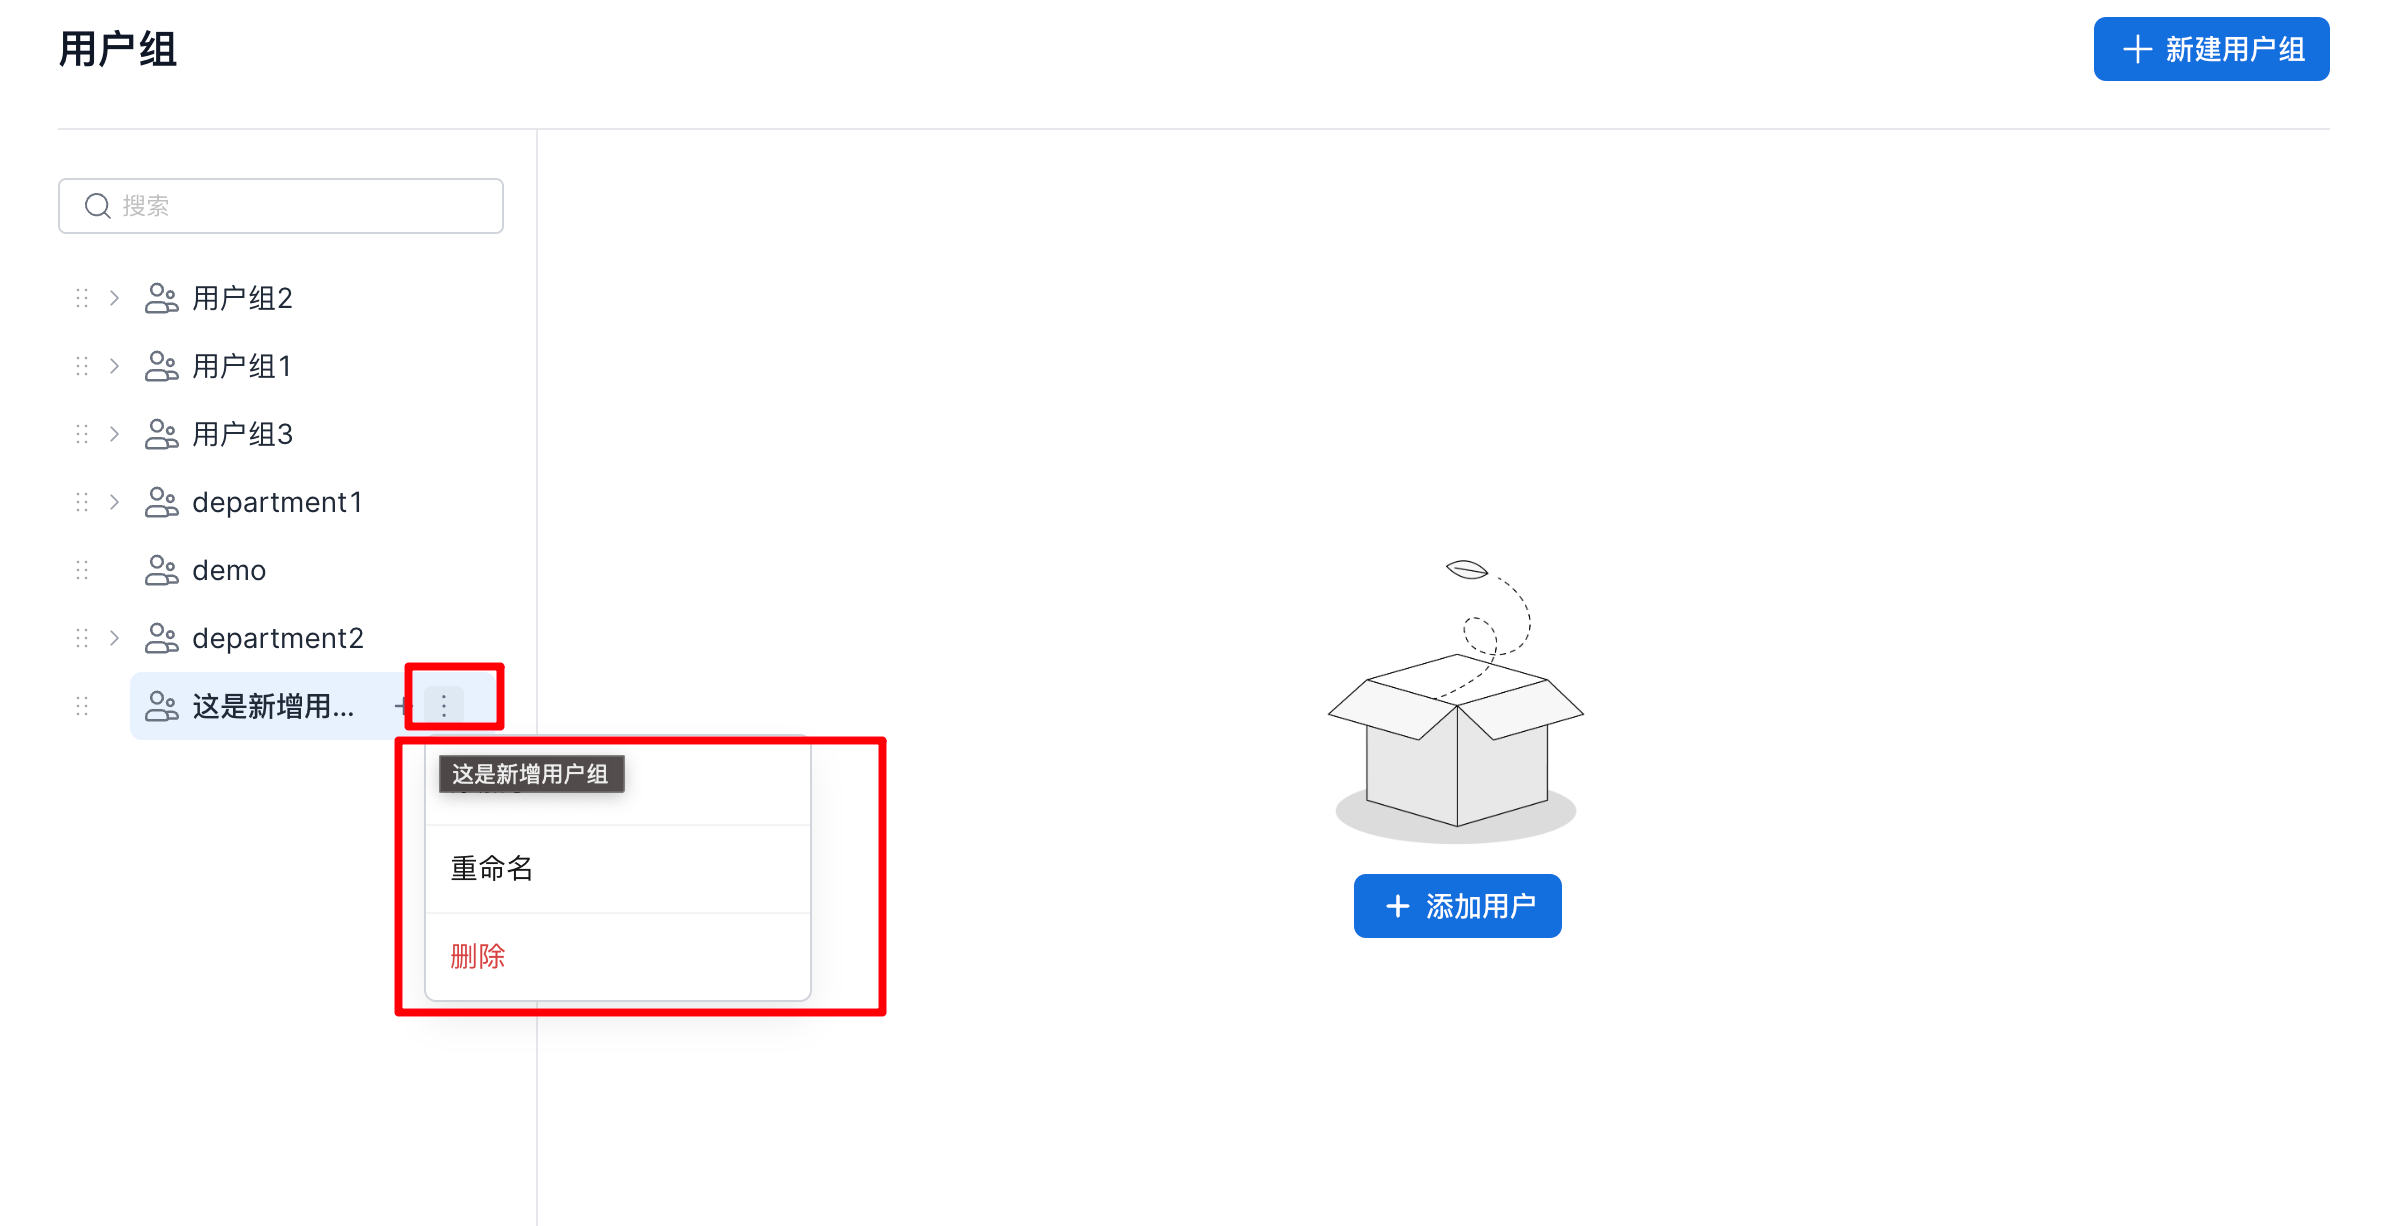
- On the user group page, select the target user group from the user group list. On the right side, click the
...button and select Rename, as shown below.
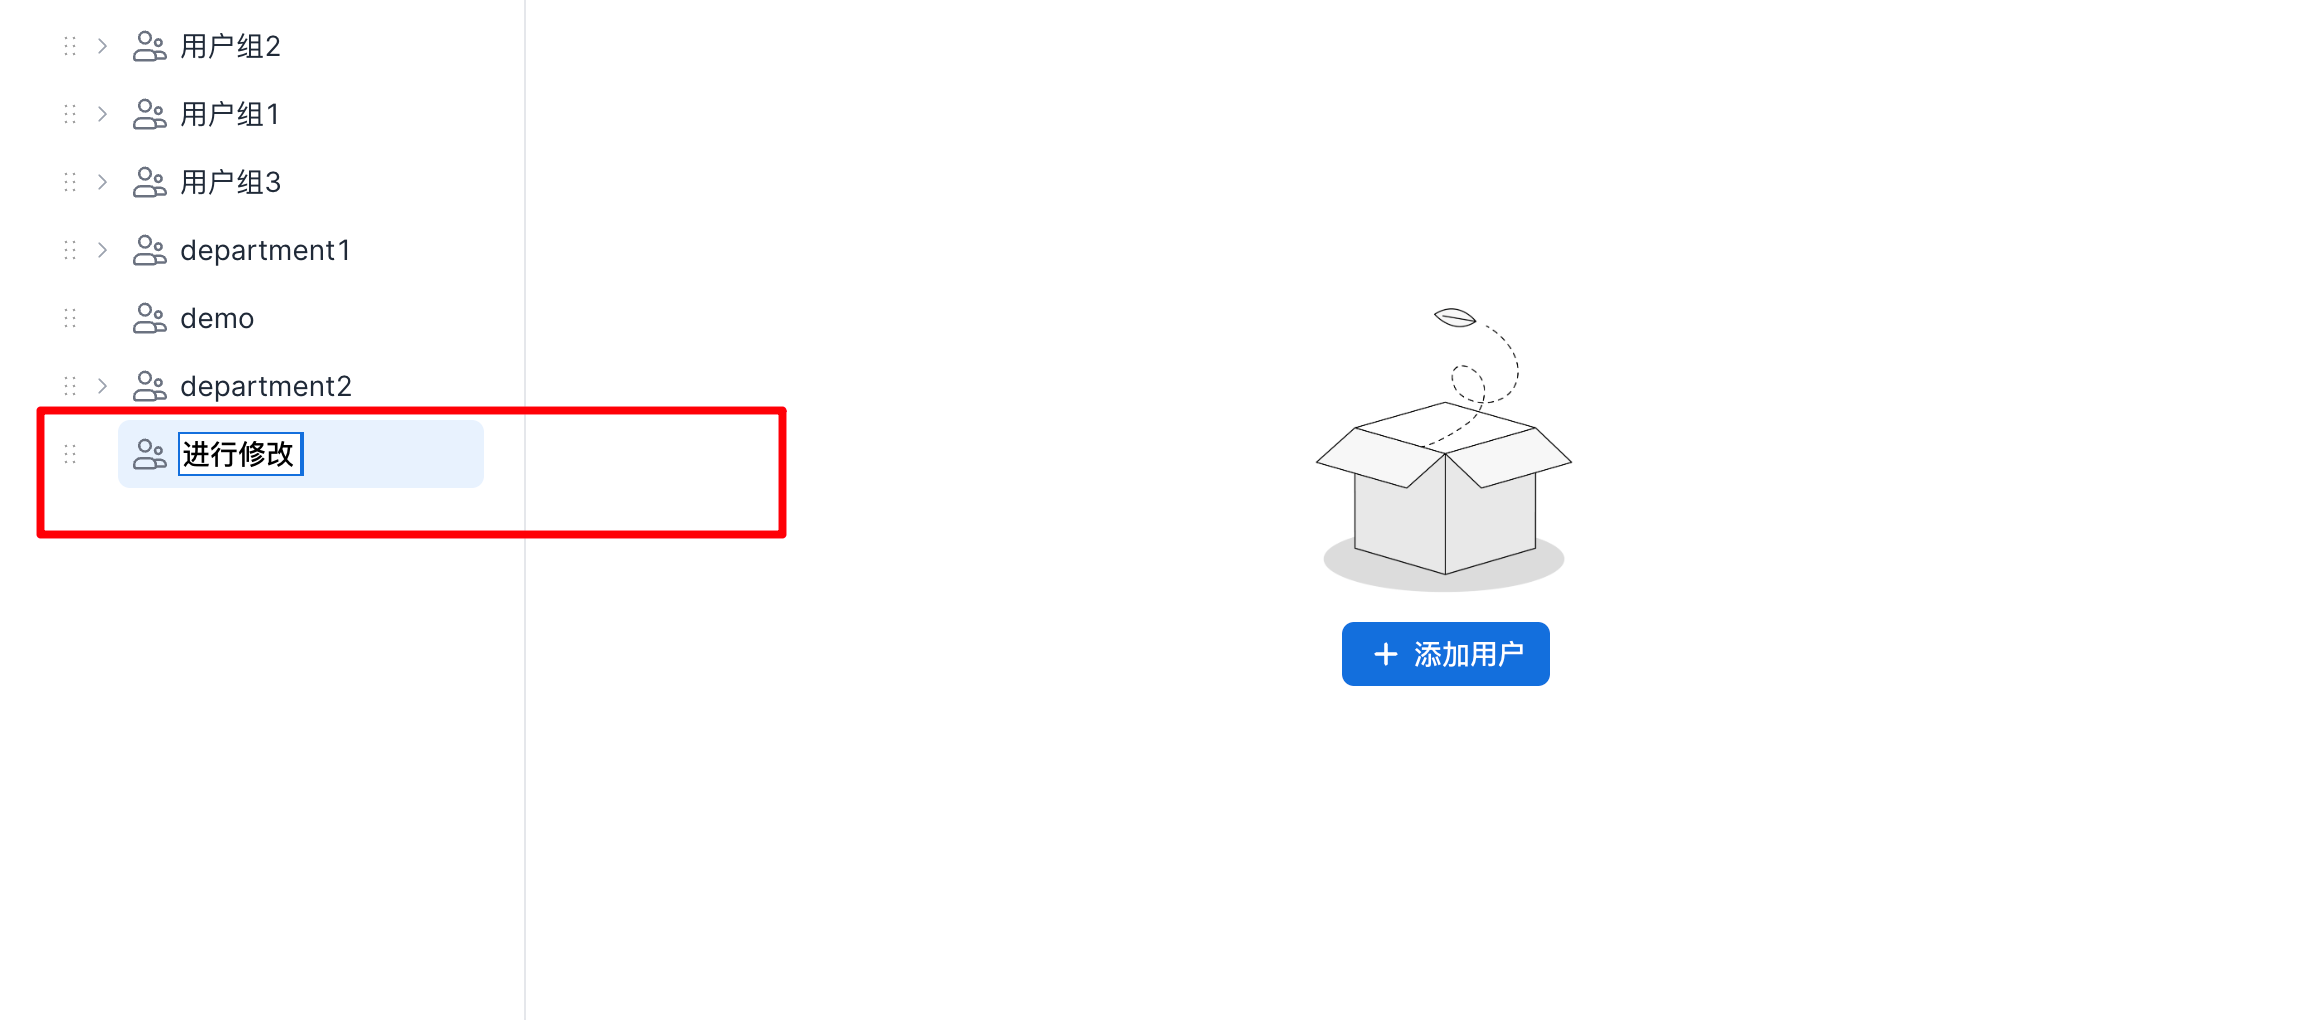
- Rename the user group, as shown below.
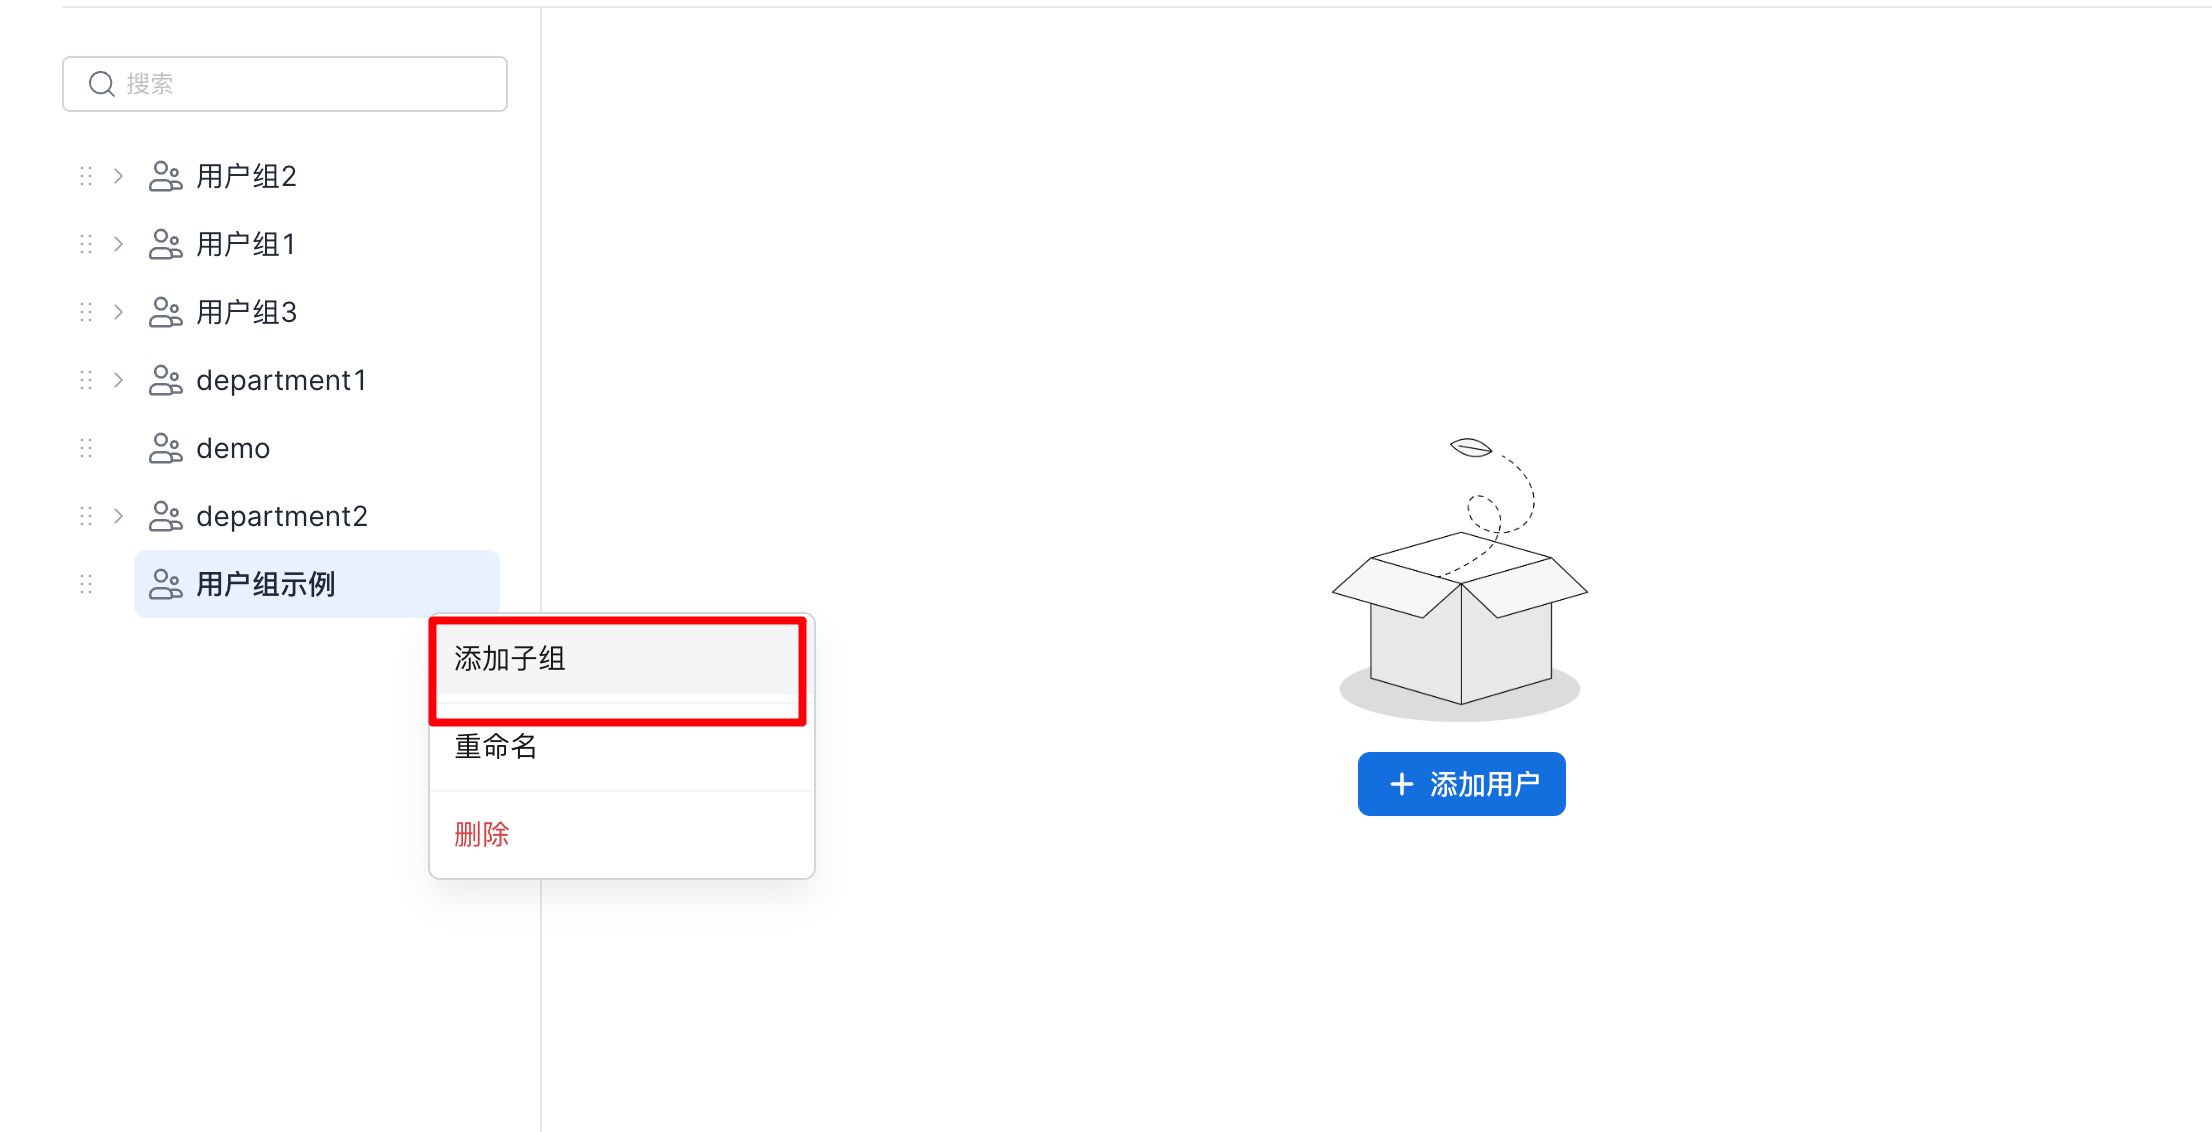
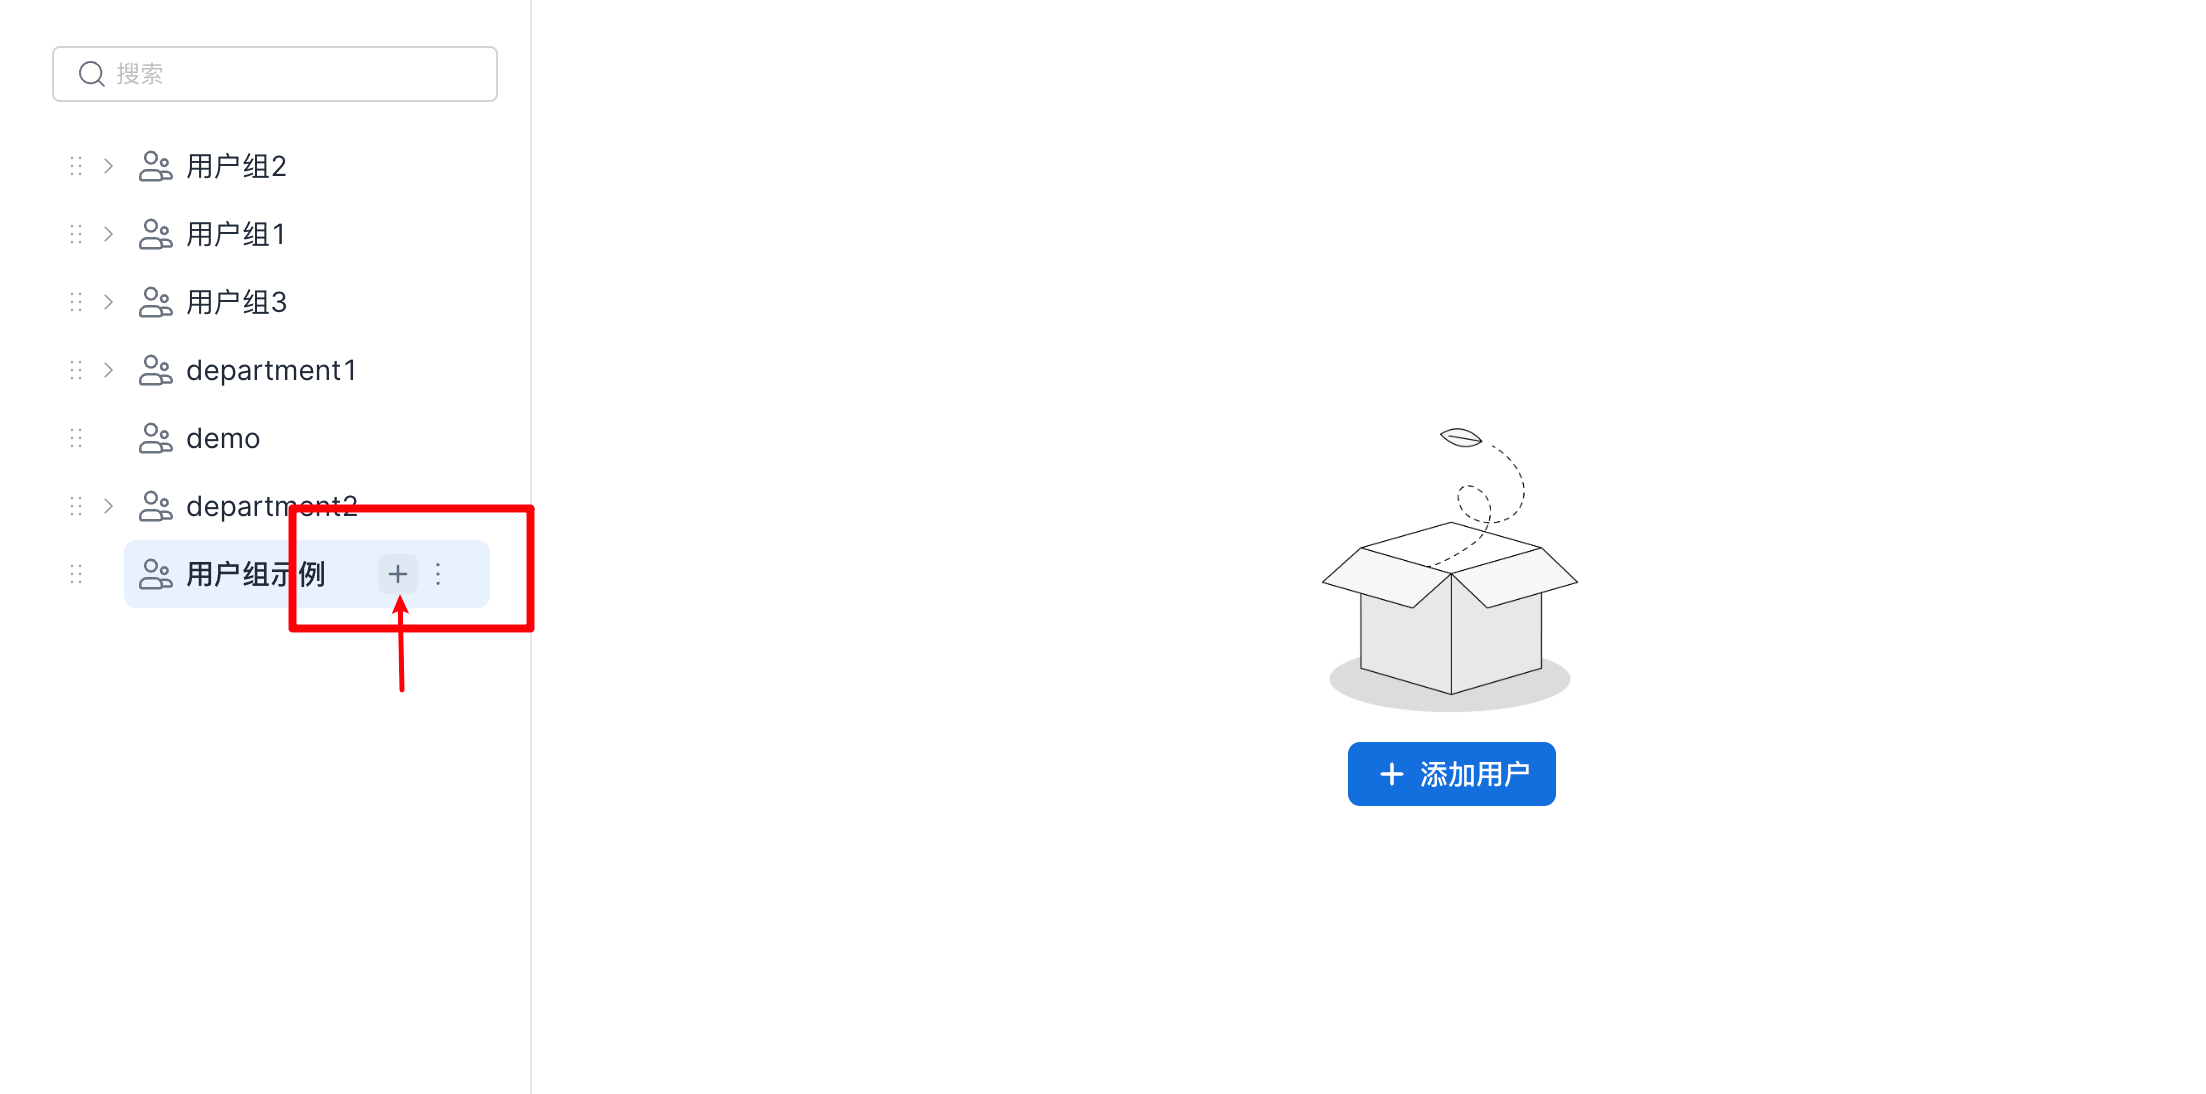
Add a Child User Group
- You can add a child user group in either of the following ways.
- On the user group page, select the target user group from the user group list. On the right side, click the
...button and selectAdd Child Group, as shown below.
- On the user group page, select the target user group from the user group list. On the right side, click the
+button to add a child user group, as shown below.
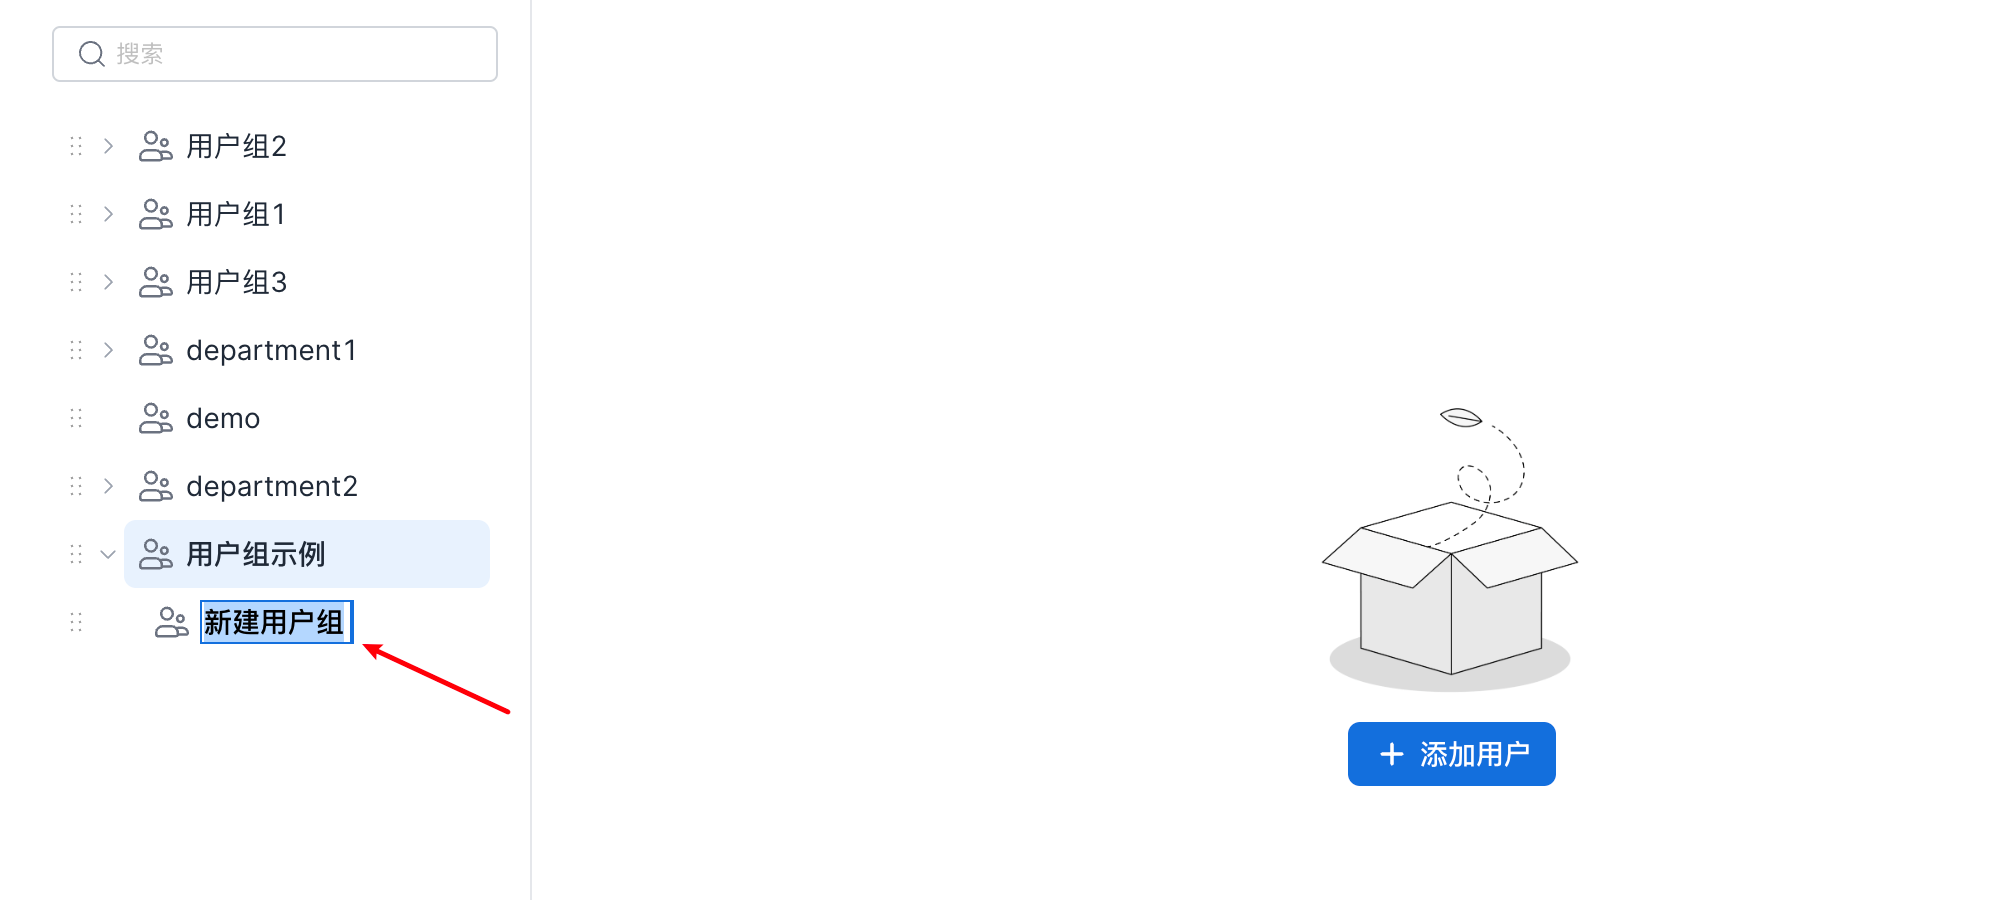
- After clicking Add Child Group, edit the child user group name and save the change.
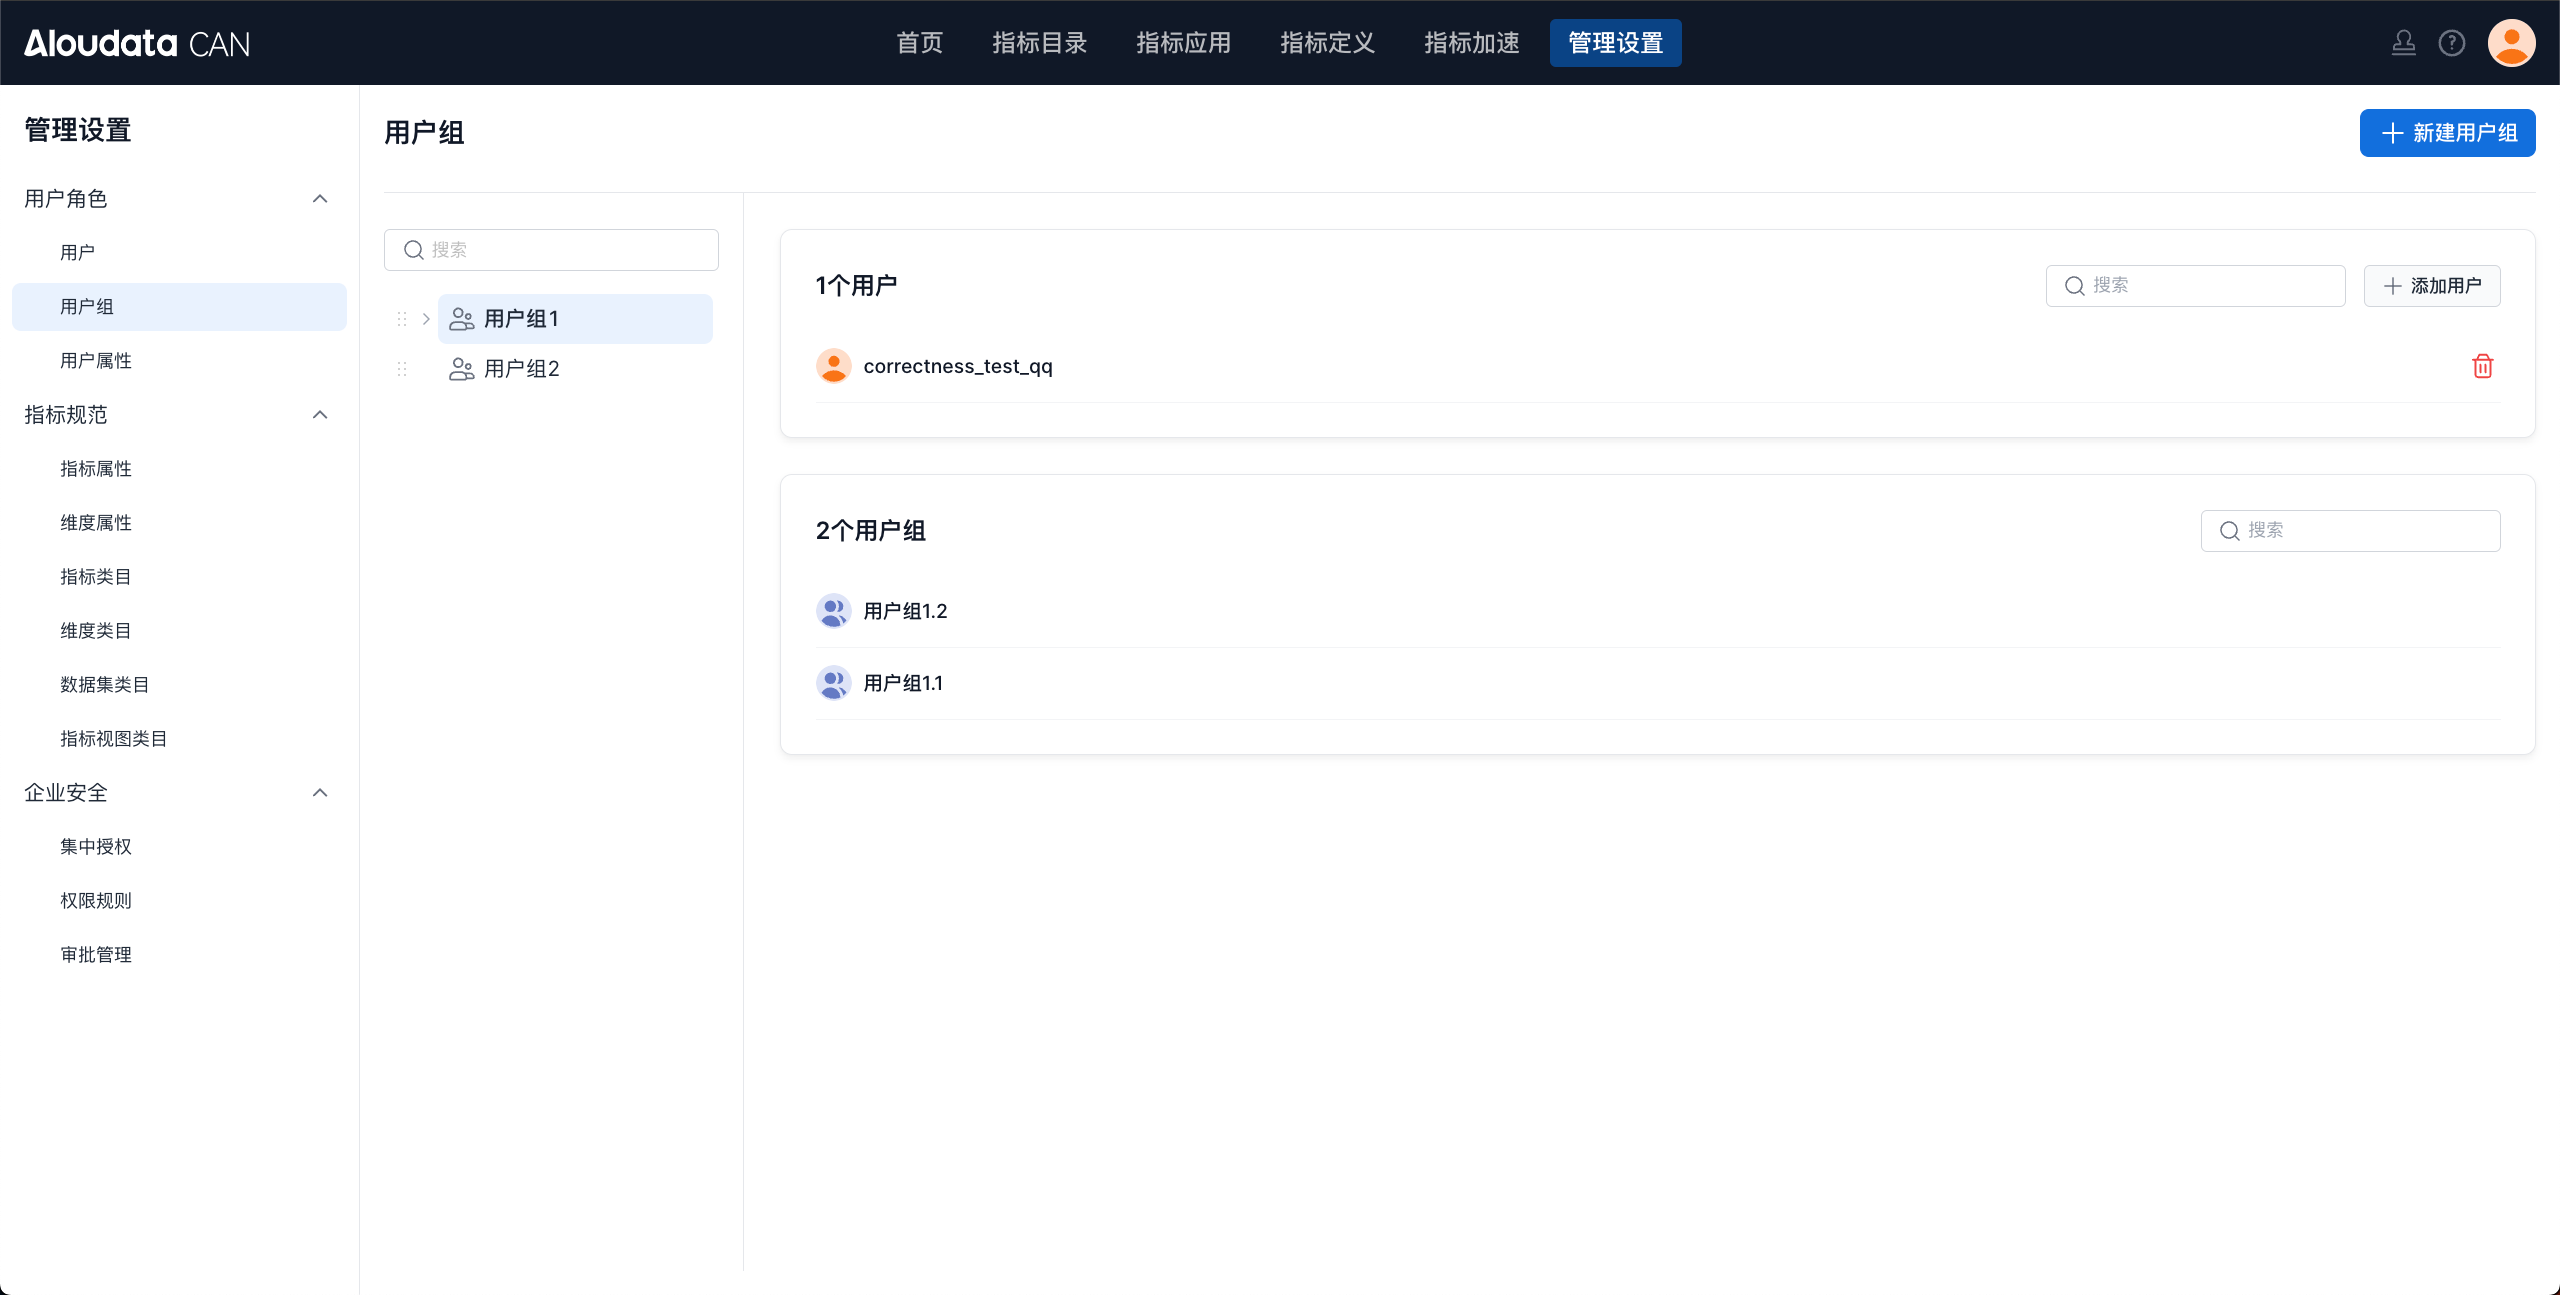
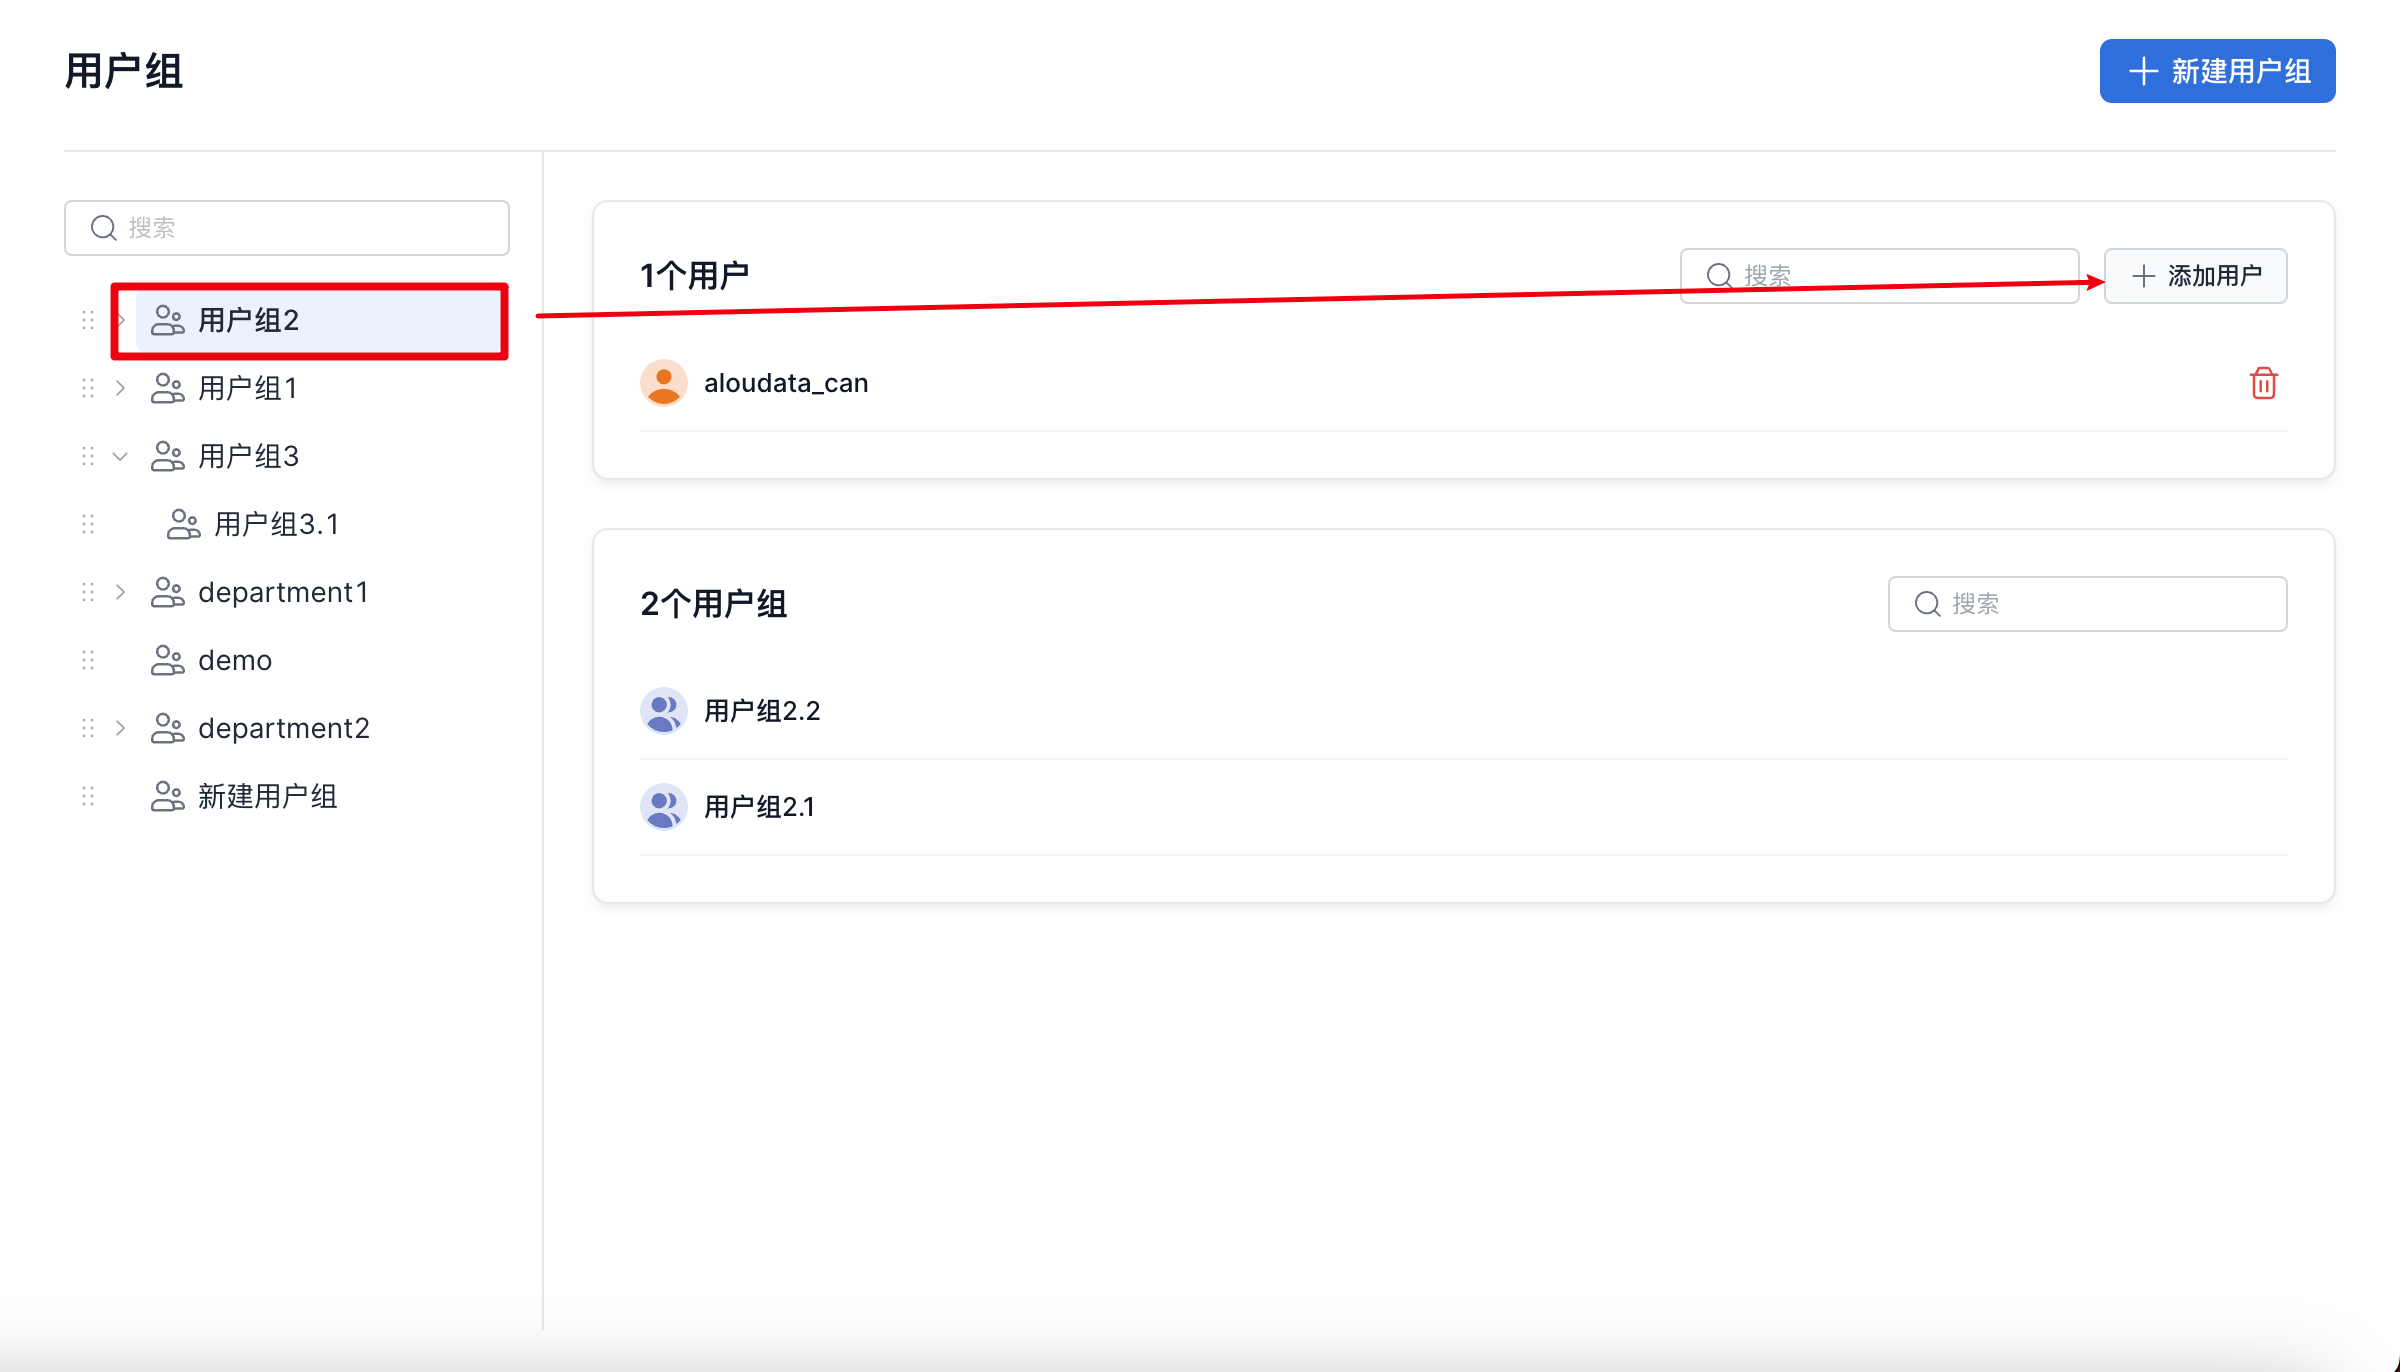
Add Users to a User Group
- On the user group page, click a user group. In the details pane on the right, click
Add User, as shown below.
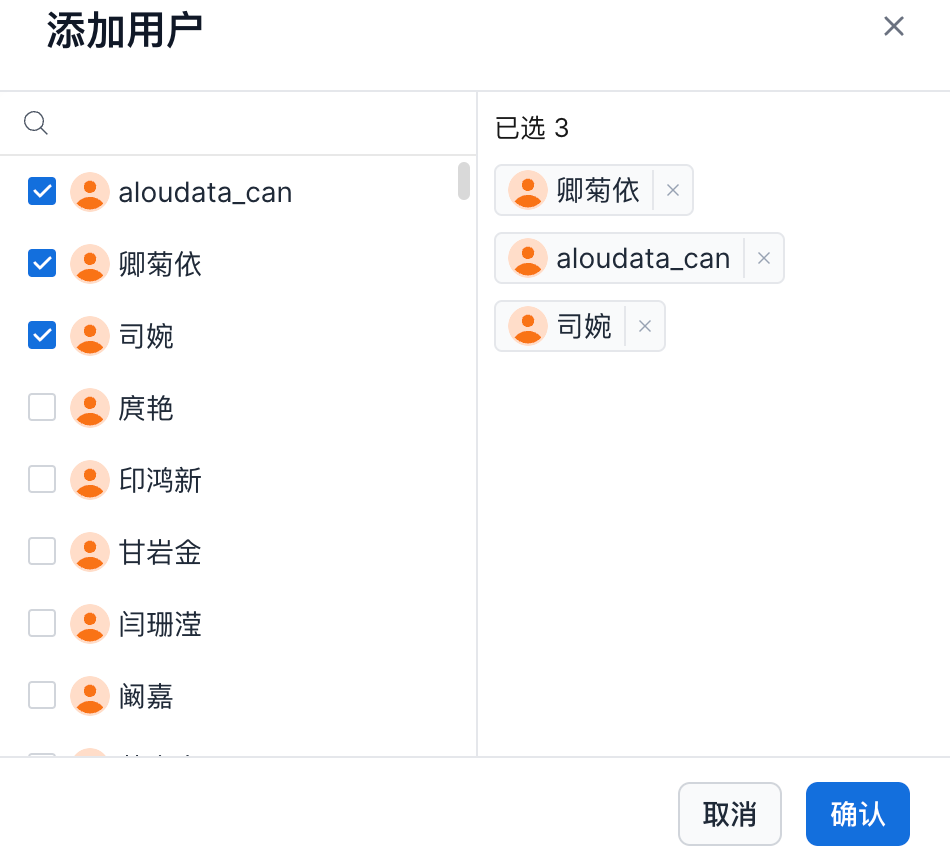
- In the add user window, select the target users and click Confirm to add them.
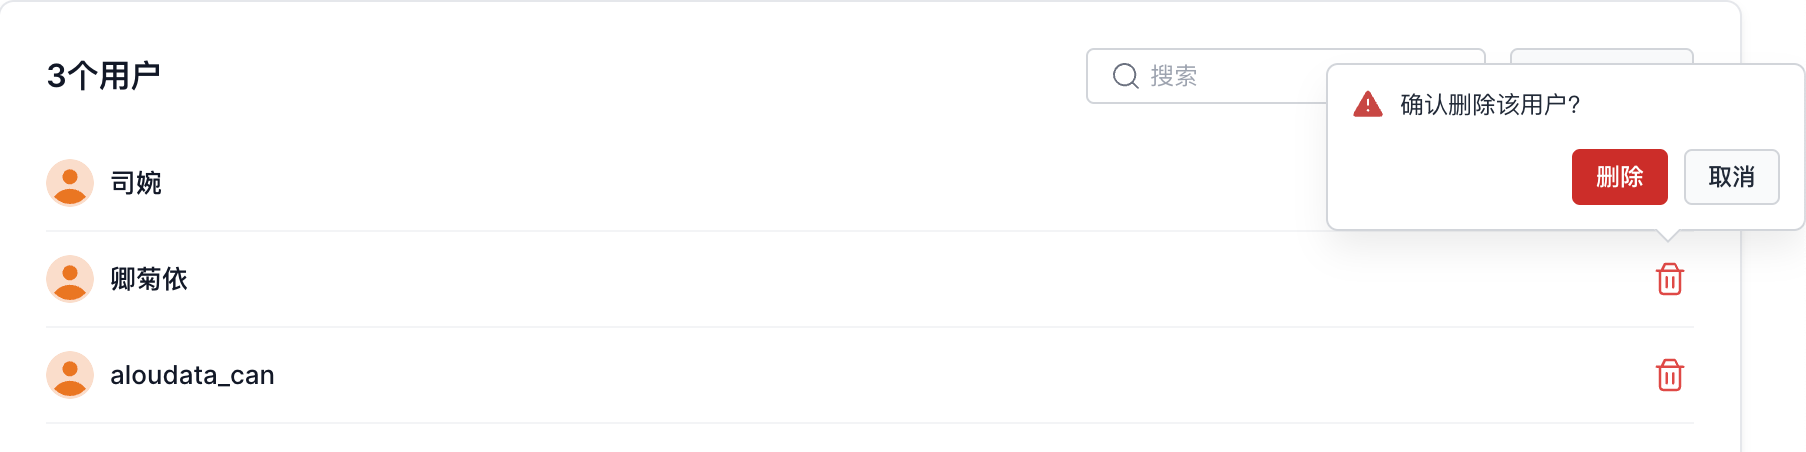
Remove Users from a User Group
- On the user group page, click a user group. In the details pane on the right, click Delete, as shown below.

- In the delete confirmation dialog, click Confirm to remove the user from the user group.