LDAP Authentication Configuration
1. Feature Introduction
This product supports LDAP (Lightweight Directory Access Protocol) login authentication. By configuring LDAP parameters, you can authenticate users against an LDAP server, helping enterprises centrally manage login permissions and improve system security and user management efficiency.
2. Procedure
-
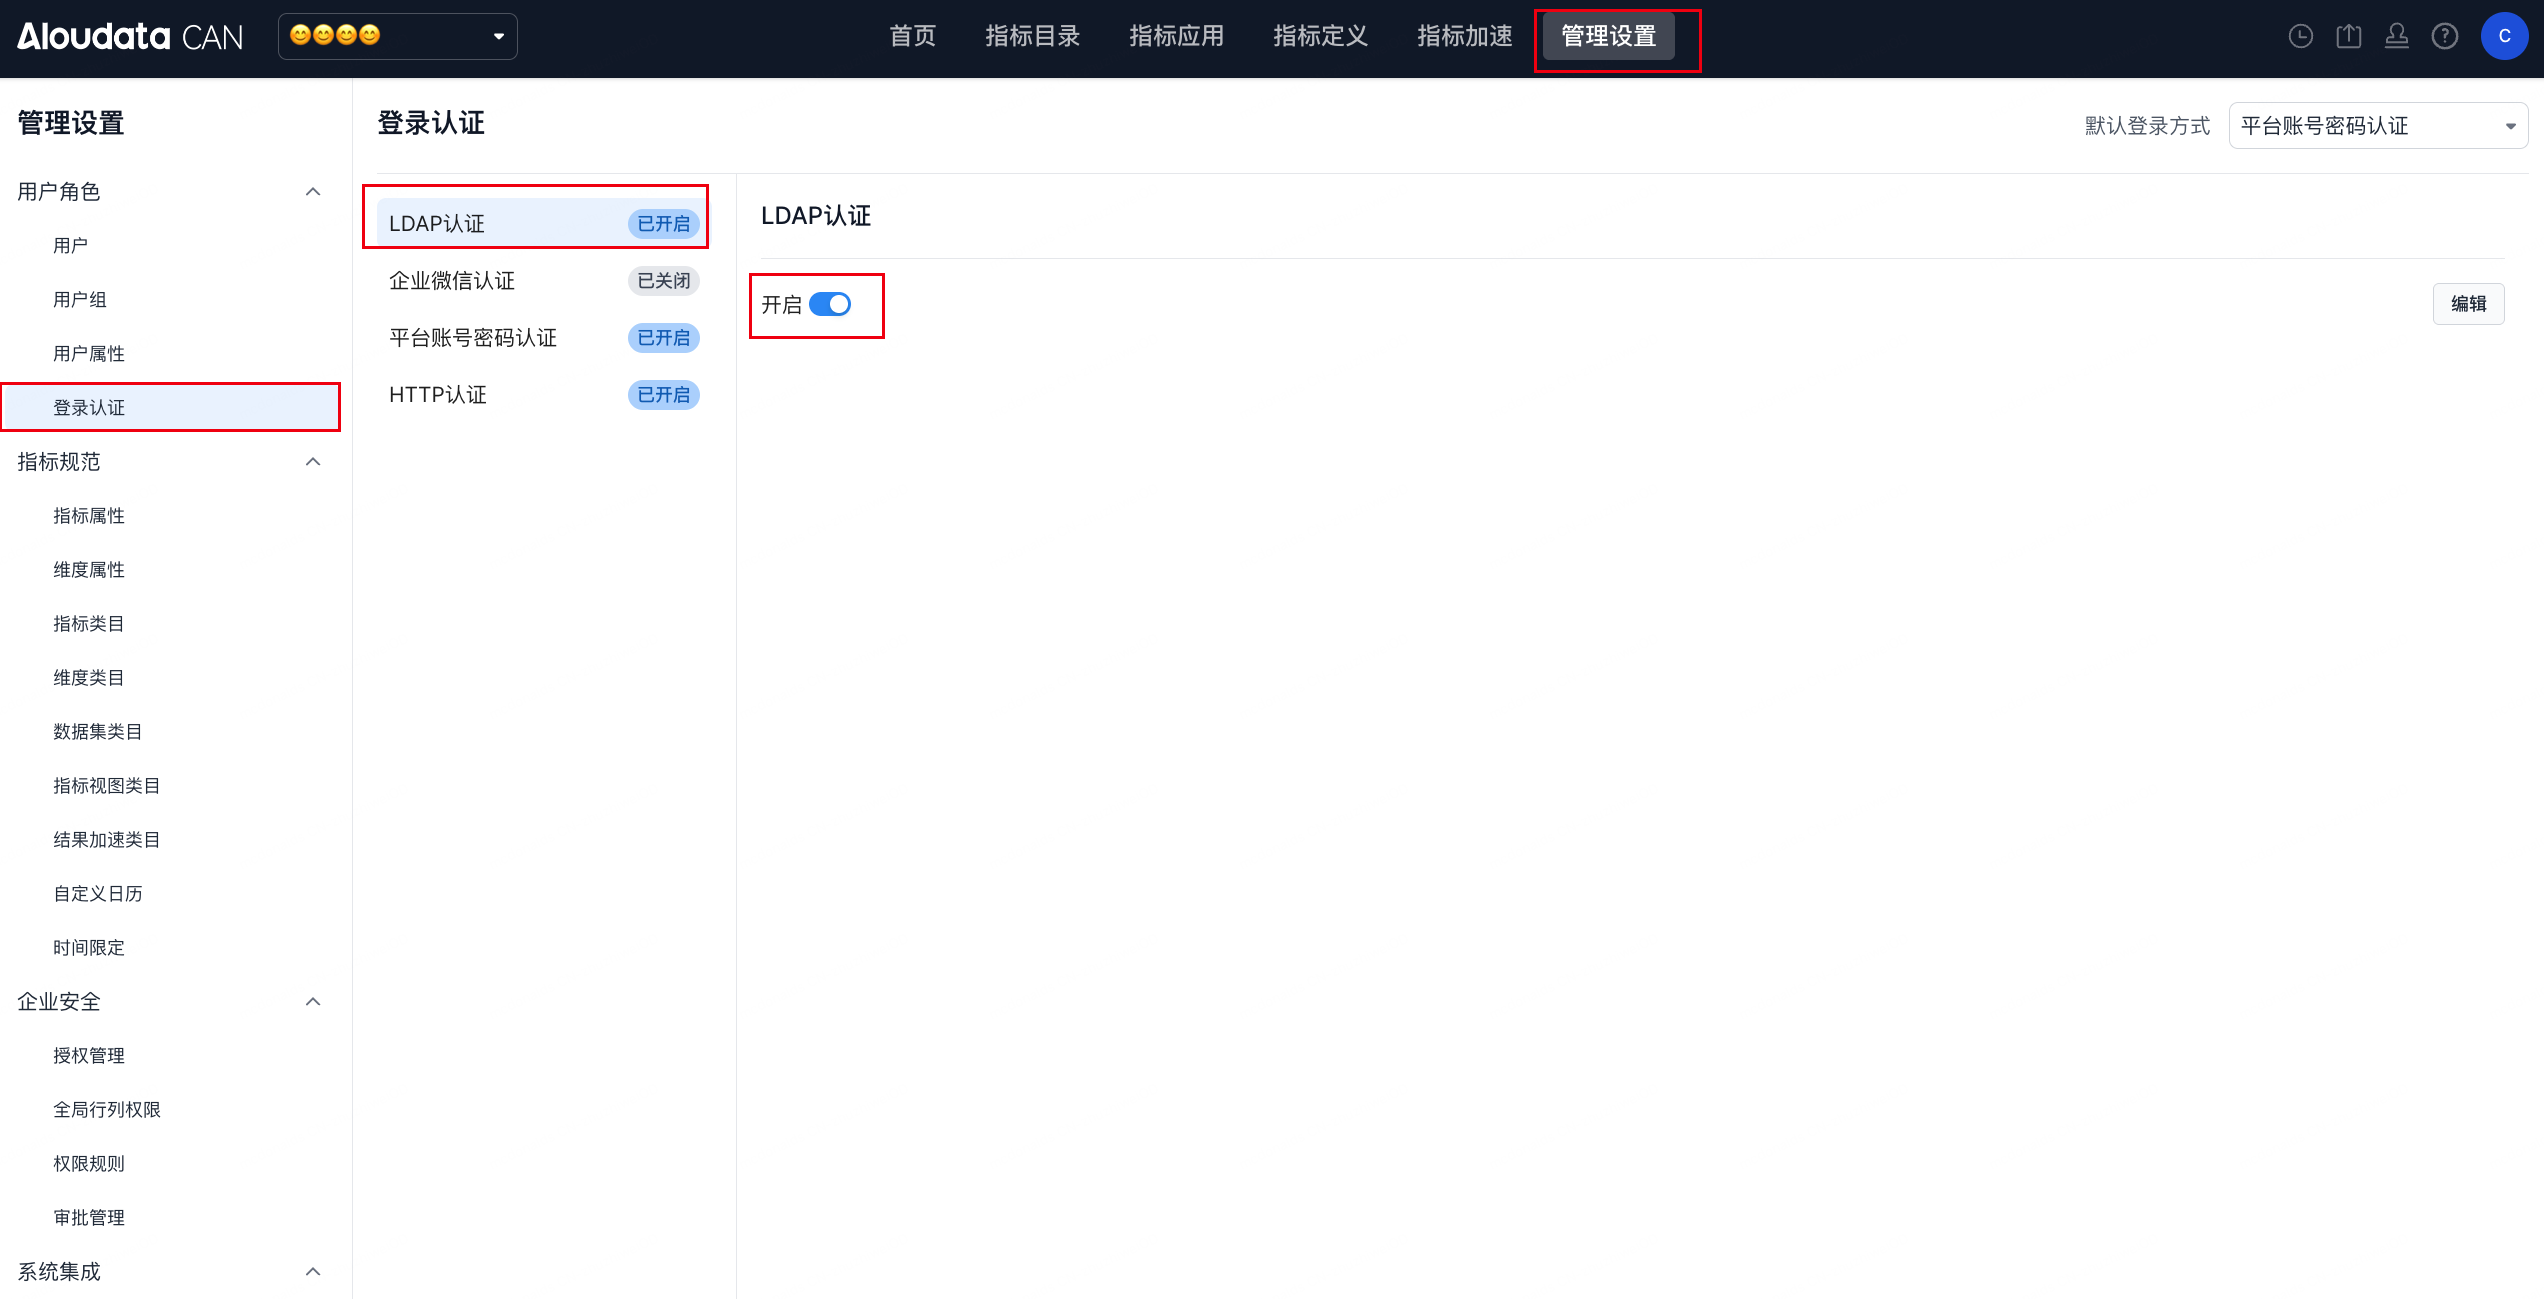
Go to the LDAP authentication settings page.
In the top navigation bar, select Management Settings. Then select User Roles > Login Authentication > LDAP Authentication.
-
Fill in the core LDAP configuration parameters.
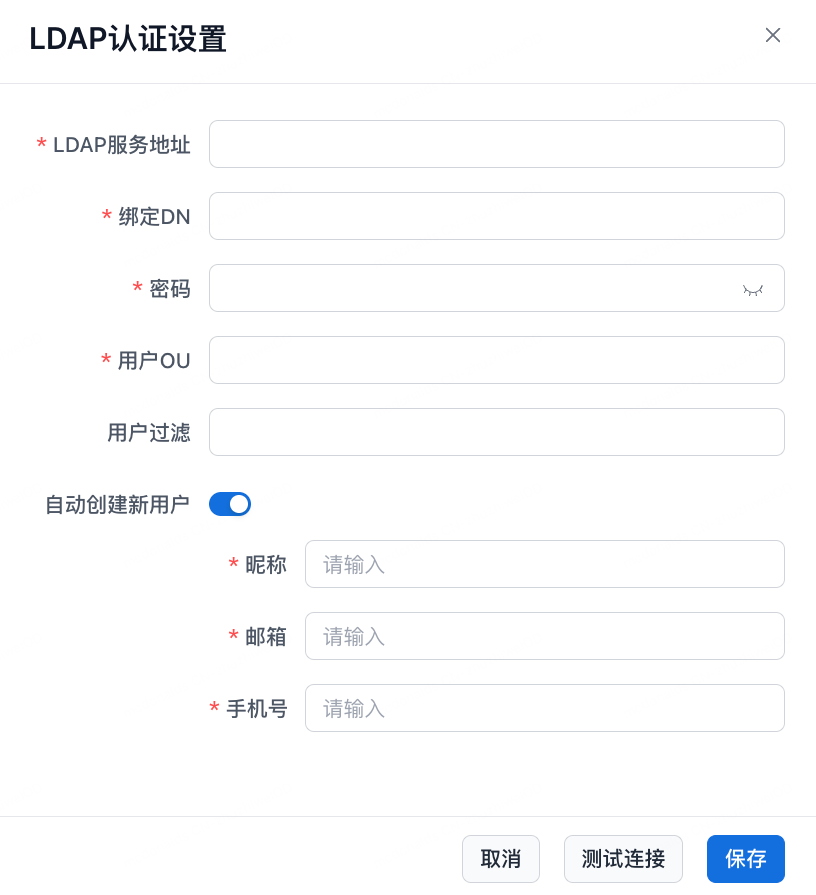
| Configuration Item | Description | Example |
|---|---|---|
| *LDAP Server URL | Enter the LDAP server URL. The format is usually ldap://[server IP or domain]:[port]. The product uses this URL to connect to the LDAP server. |
ldap://192.168.1.100:389 |
| *Bind DN | Enter the Distinguished Name used for LDAP bind authentication. This identifies the bind user to the LDAP server and must match the actual LDAP directory structure. | cn=admin,dc=example,dc=com |
| *Password | Enter the authentication password corresponding to the Bind DN. The product uses it to prove that the bind user is valid. | Enter the actual password. There is no fixed example. |
| *User OU | Enter the Organizational Unit where users are located in LDAP. This limits the scope in which the product searches for user information in LDAP. Multiple values can be entered and separated with |. |
CN=LDAP,OU=USER,DC=example,DC=com |
| User Filter | Enter an LDAP query filter to further filter eligible users. Only LDAP users that match the filter can log in through authentication. | (\|(uid={0})) |
| Automatically Create New Users | After this is enabled, if LDAP authentication succeeds but no corresponding user exists in the product, the system automatically creates a new user. You must provide templates for information such as nickname, email, and phone number. | After enabling this option, enter a nickname, such as LDAP_User; an email, such as the LDAP mail attribute in the format %{mail}@example.com; and a phone number, which can be mapped to the LDAP mobile attribute or set to a fixed value. |
- Test and save the configuration.
-
Test the connection.
After completing the configuration above, click Test Connection. The product attempts to connect to the LDAP server with the configured parameters and verifies the bind information. If the connection fails, an error message is displayed, such as a network issue or incorrect Bind DN/password. Troubleshoot and correct the configuration based on the prompt. If the connection succeeds, the basic parameters are configured correctly. -
Save the configuration.
After the connection test succeeds, click Save to persist the LDAP authentication configuration in the product. Users can then try logging in through LDAP authentication.