Backfill Materialized Data
This topic explains how to backfill data. You can backfill data by backfilling upstream dependencies at the same time or by backfilling directly from the source table.
Procedure
Entry Points
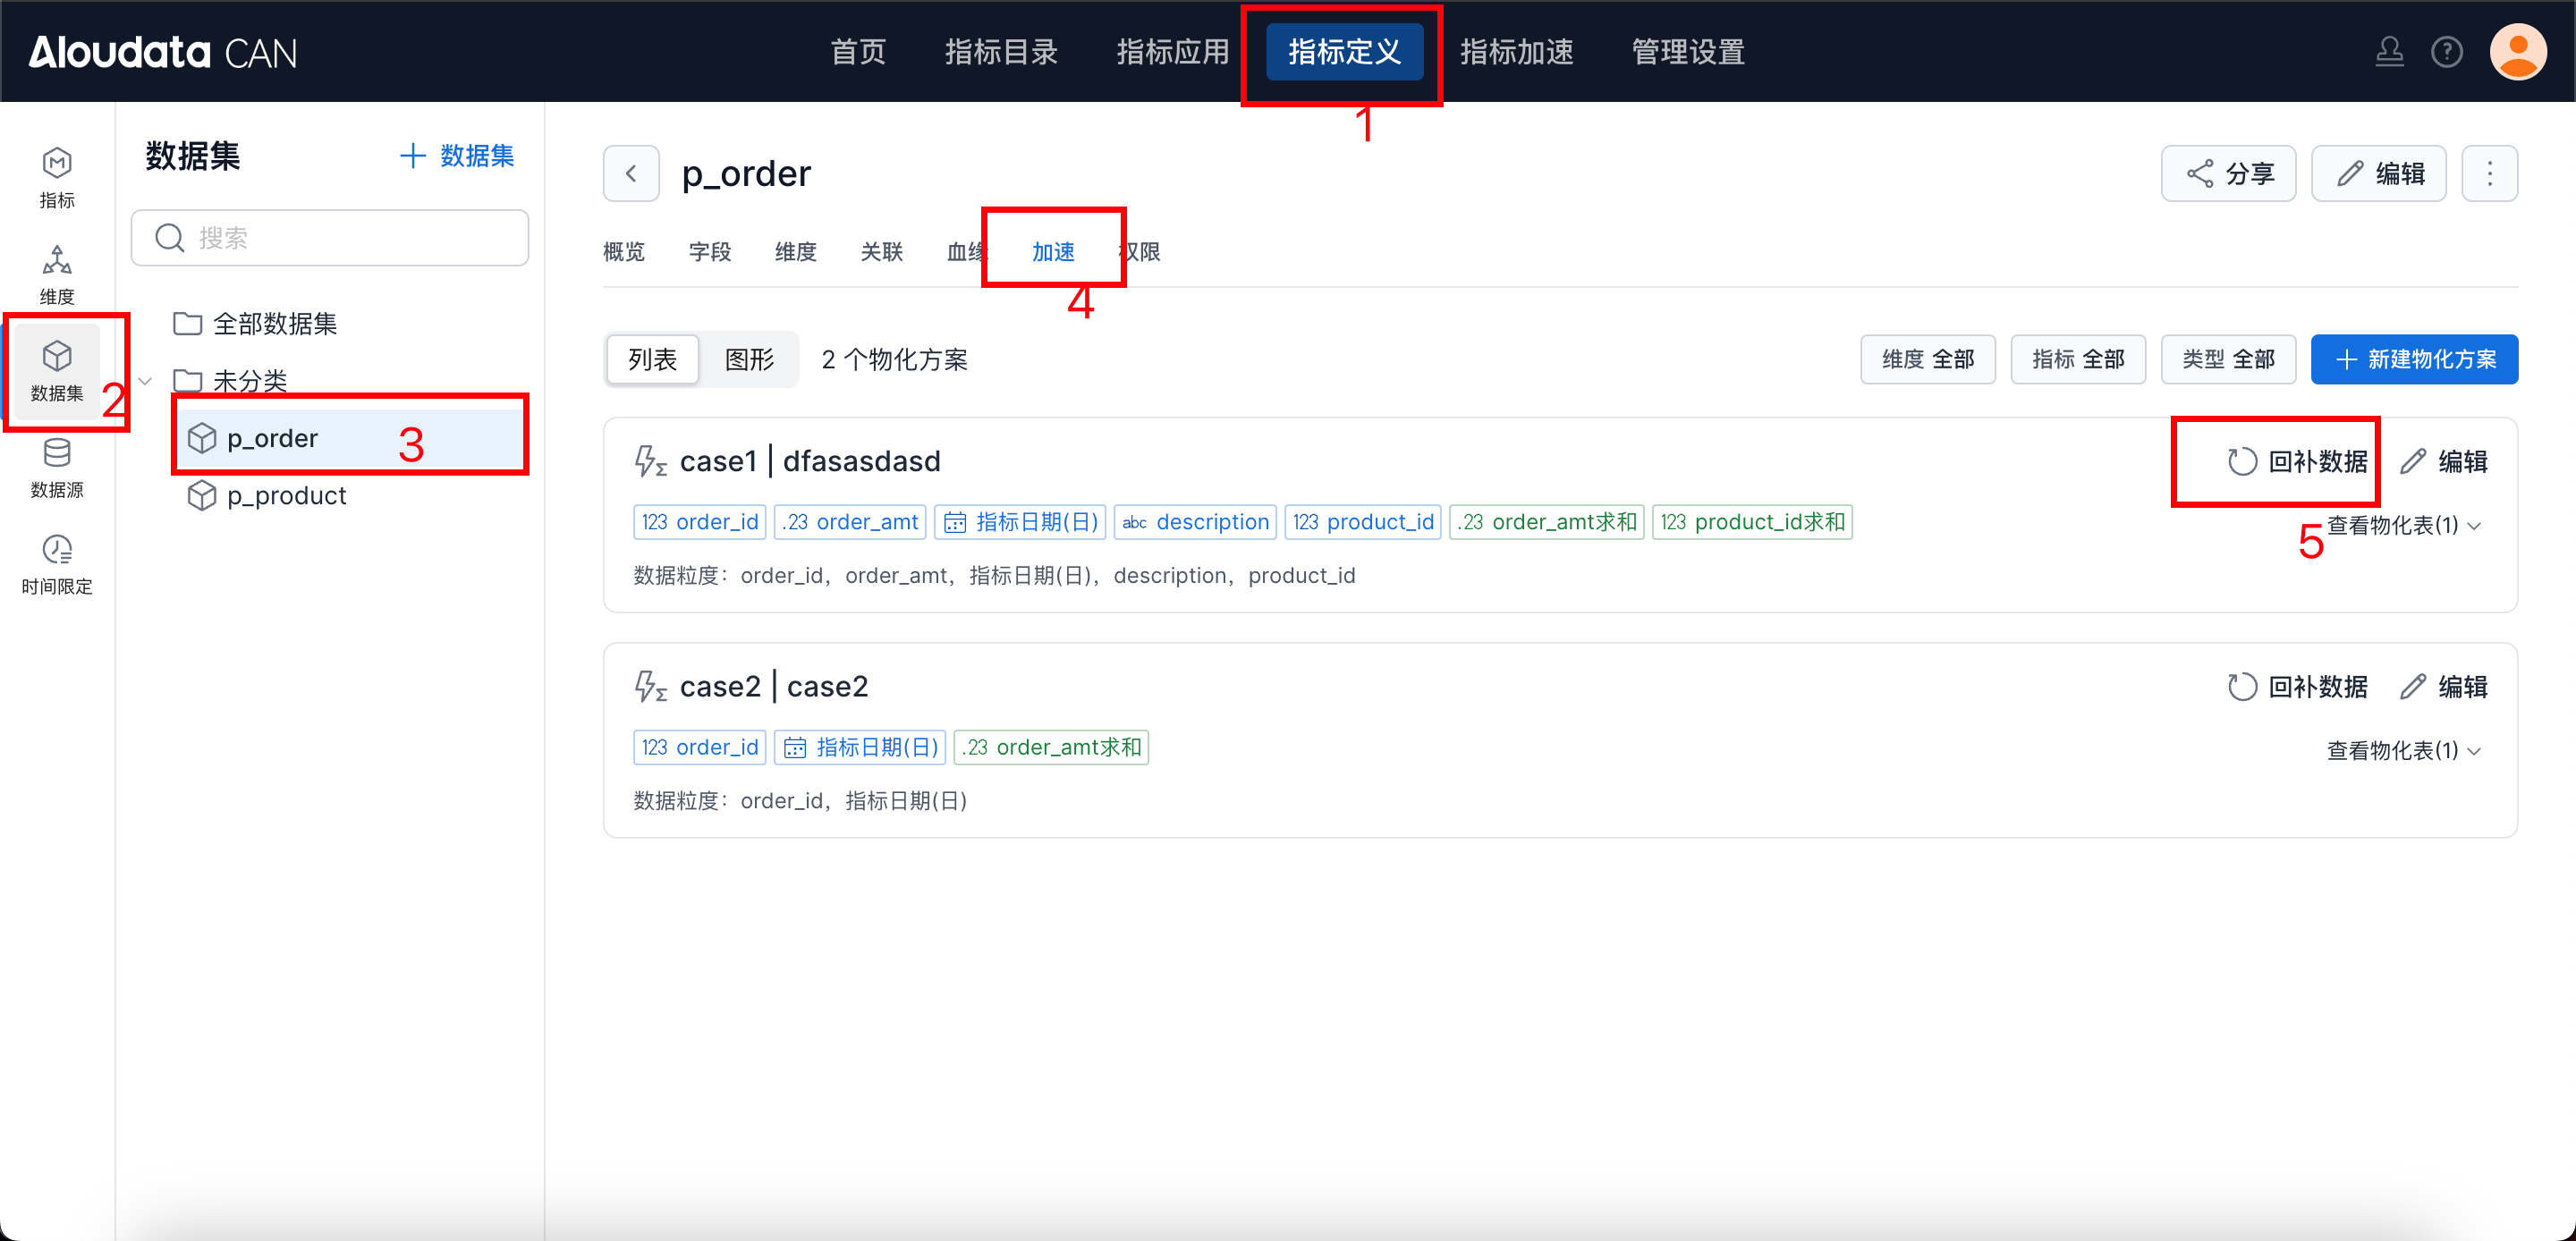
Entry point 1: In the top navigation, click Metric Definition, select the target dataset from the dataset list, open the dataset details page, choose acceleration, and click Backfill Data in the acceleration list.
Entry point 2:
Backfill Data
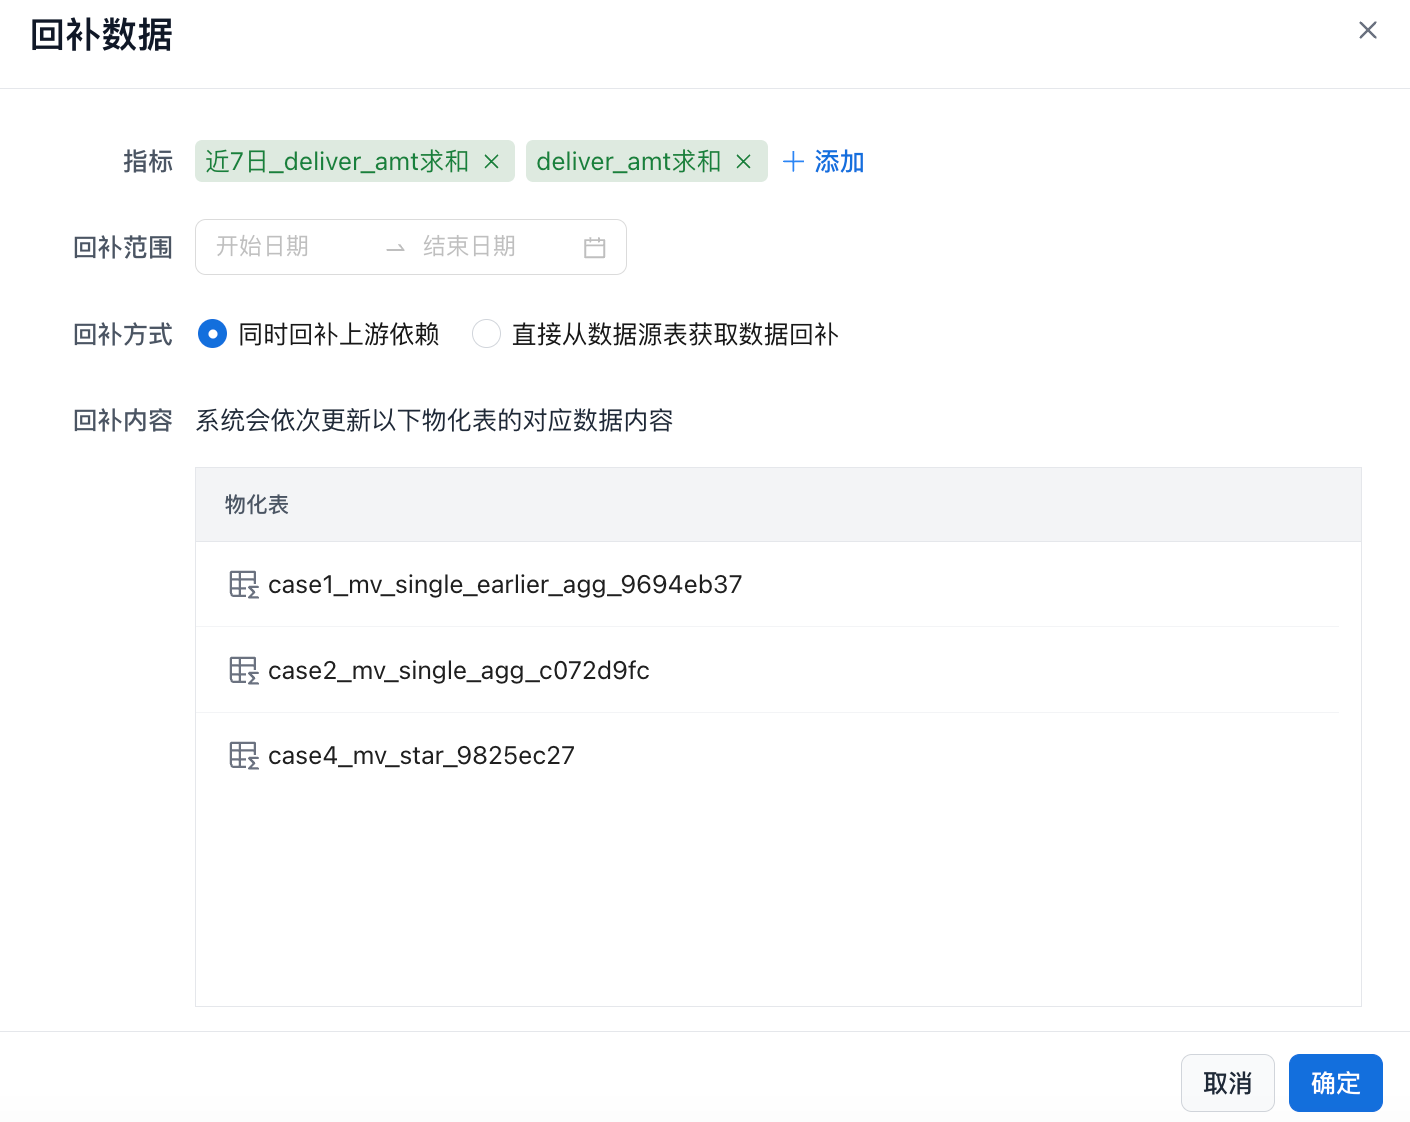
| Item | Description |
|---|---|
| Metric | This parameter appears only for metric materialized tables. You can ignore it for non-metric acceleration materialized tables. Select the metric data to update; at least one metric is required. |
| Backfill Range | This parameter appears only for partitioned tables. You can ignore it for non-partitioned tables. Select the data partition range to backfill as needed. |
| Backfill Method | * Backfill upstream dependencies at the same time In the example below, if you backfill case3xxxx by using Backfill upstream dependencies at the same time, case2xx and case4xx are also backfilled. 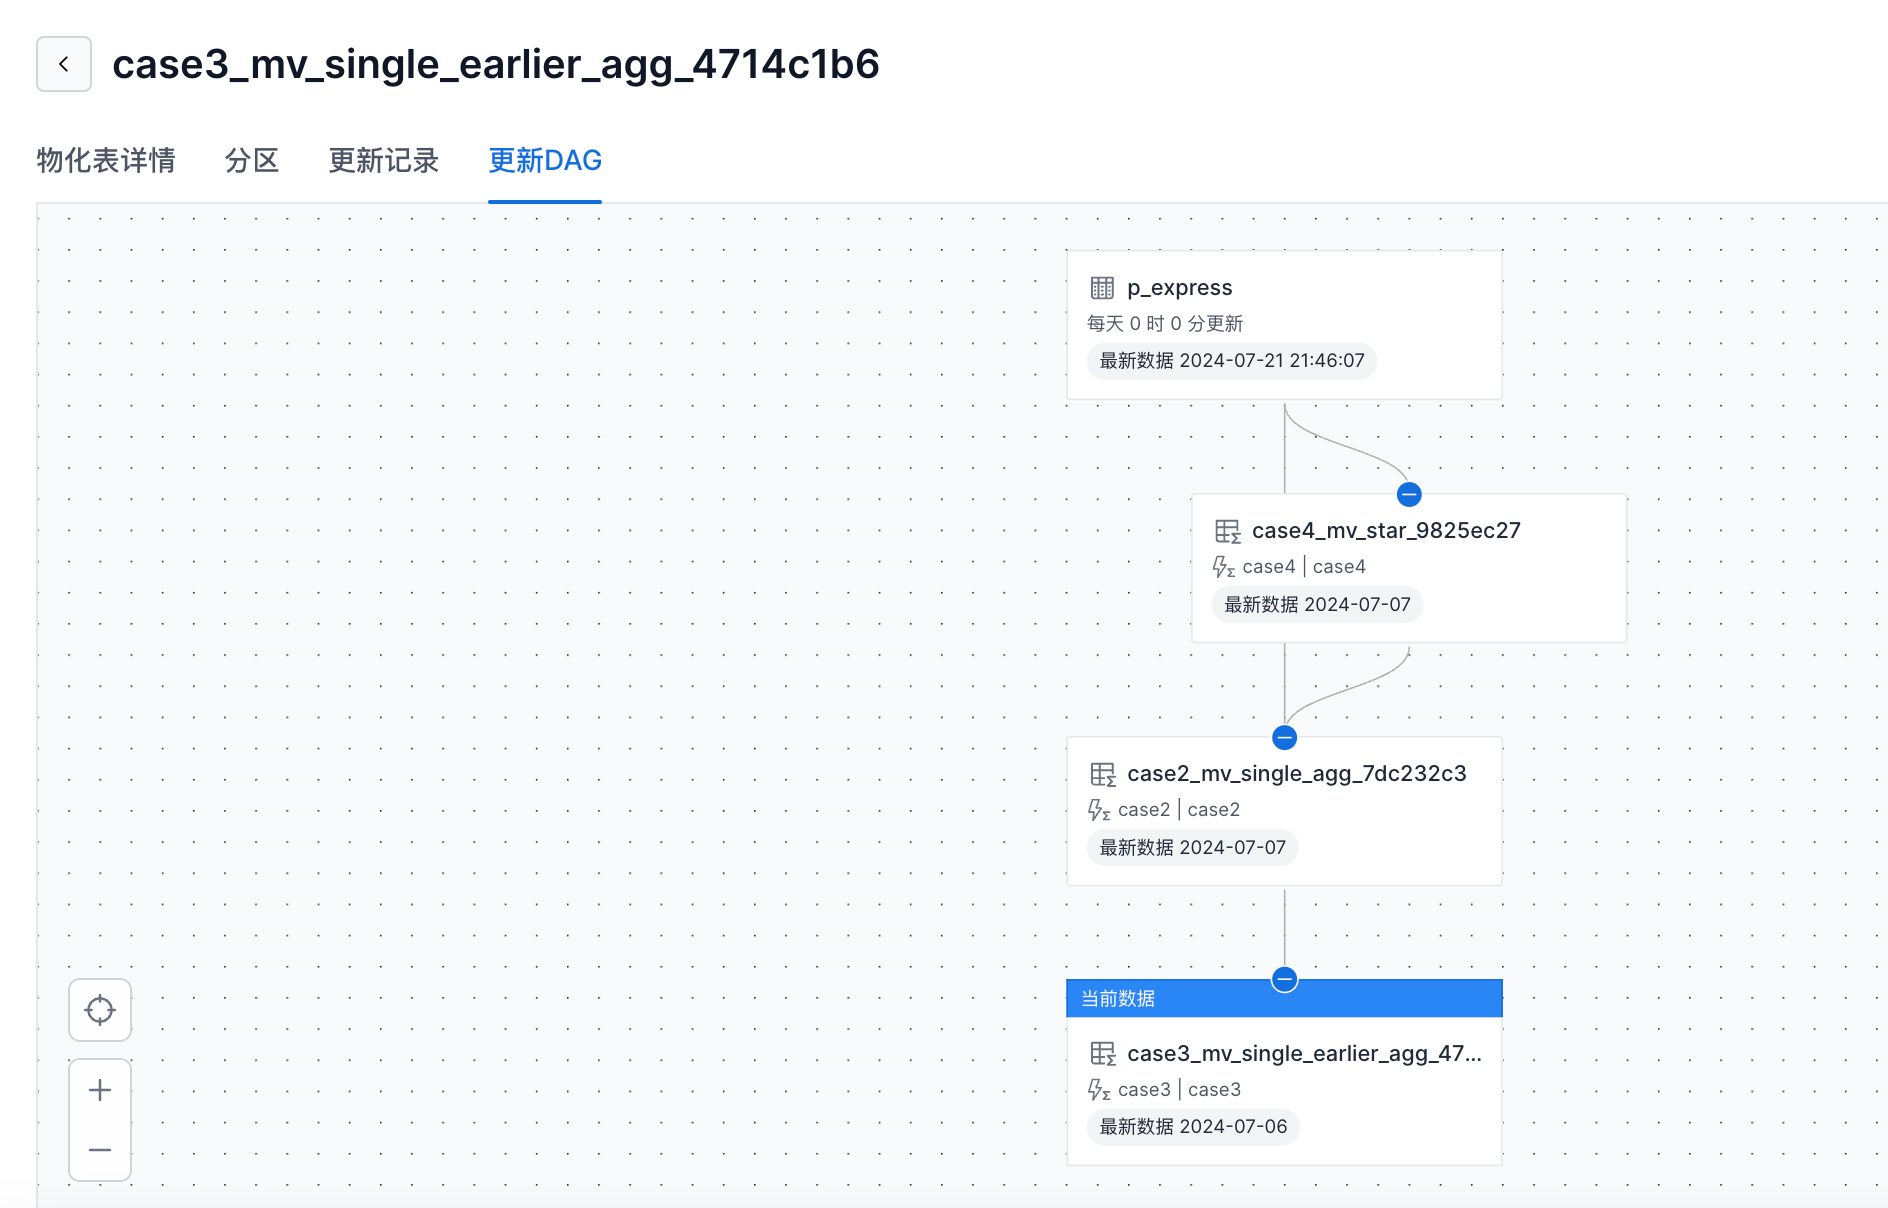 * Backfill directly from the source table In the example below, if you backfill * Backfill directly from the source table In the example below, if you backfill case3xxxx by using Backfill directly from the source table, only the current materialized table, case3xxxx, is backfilled. |
| Backfill Content | The system updates the data content corresponding to the following materialized tables in sequence. |
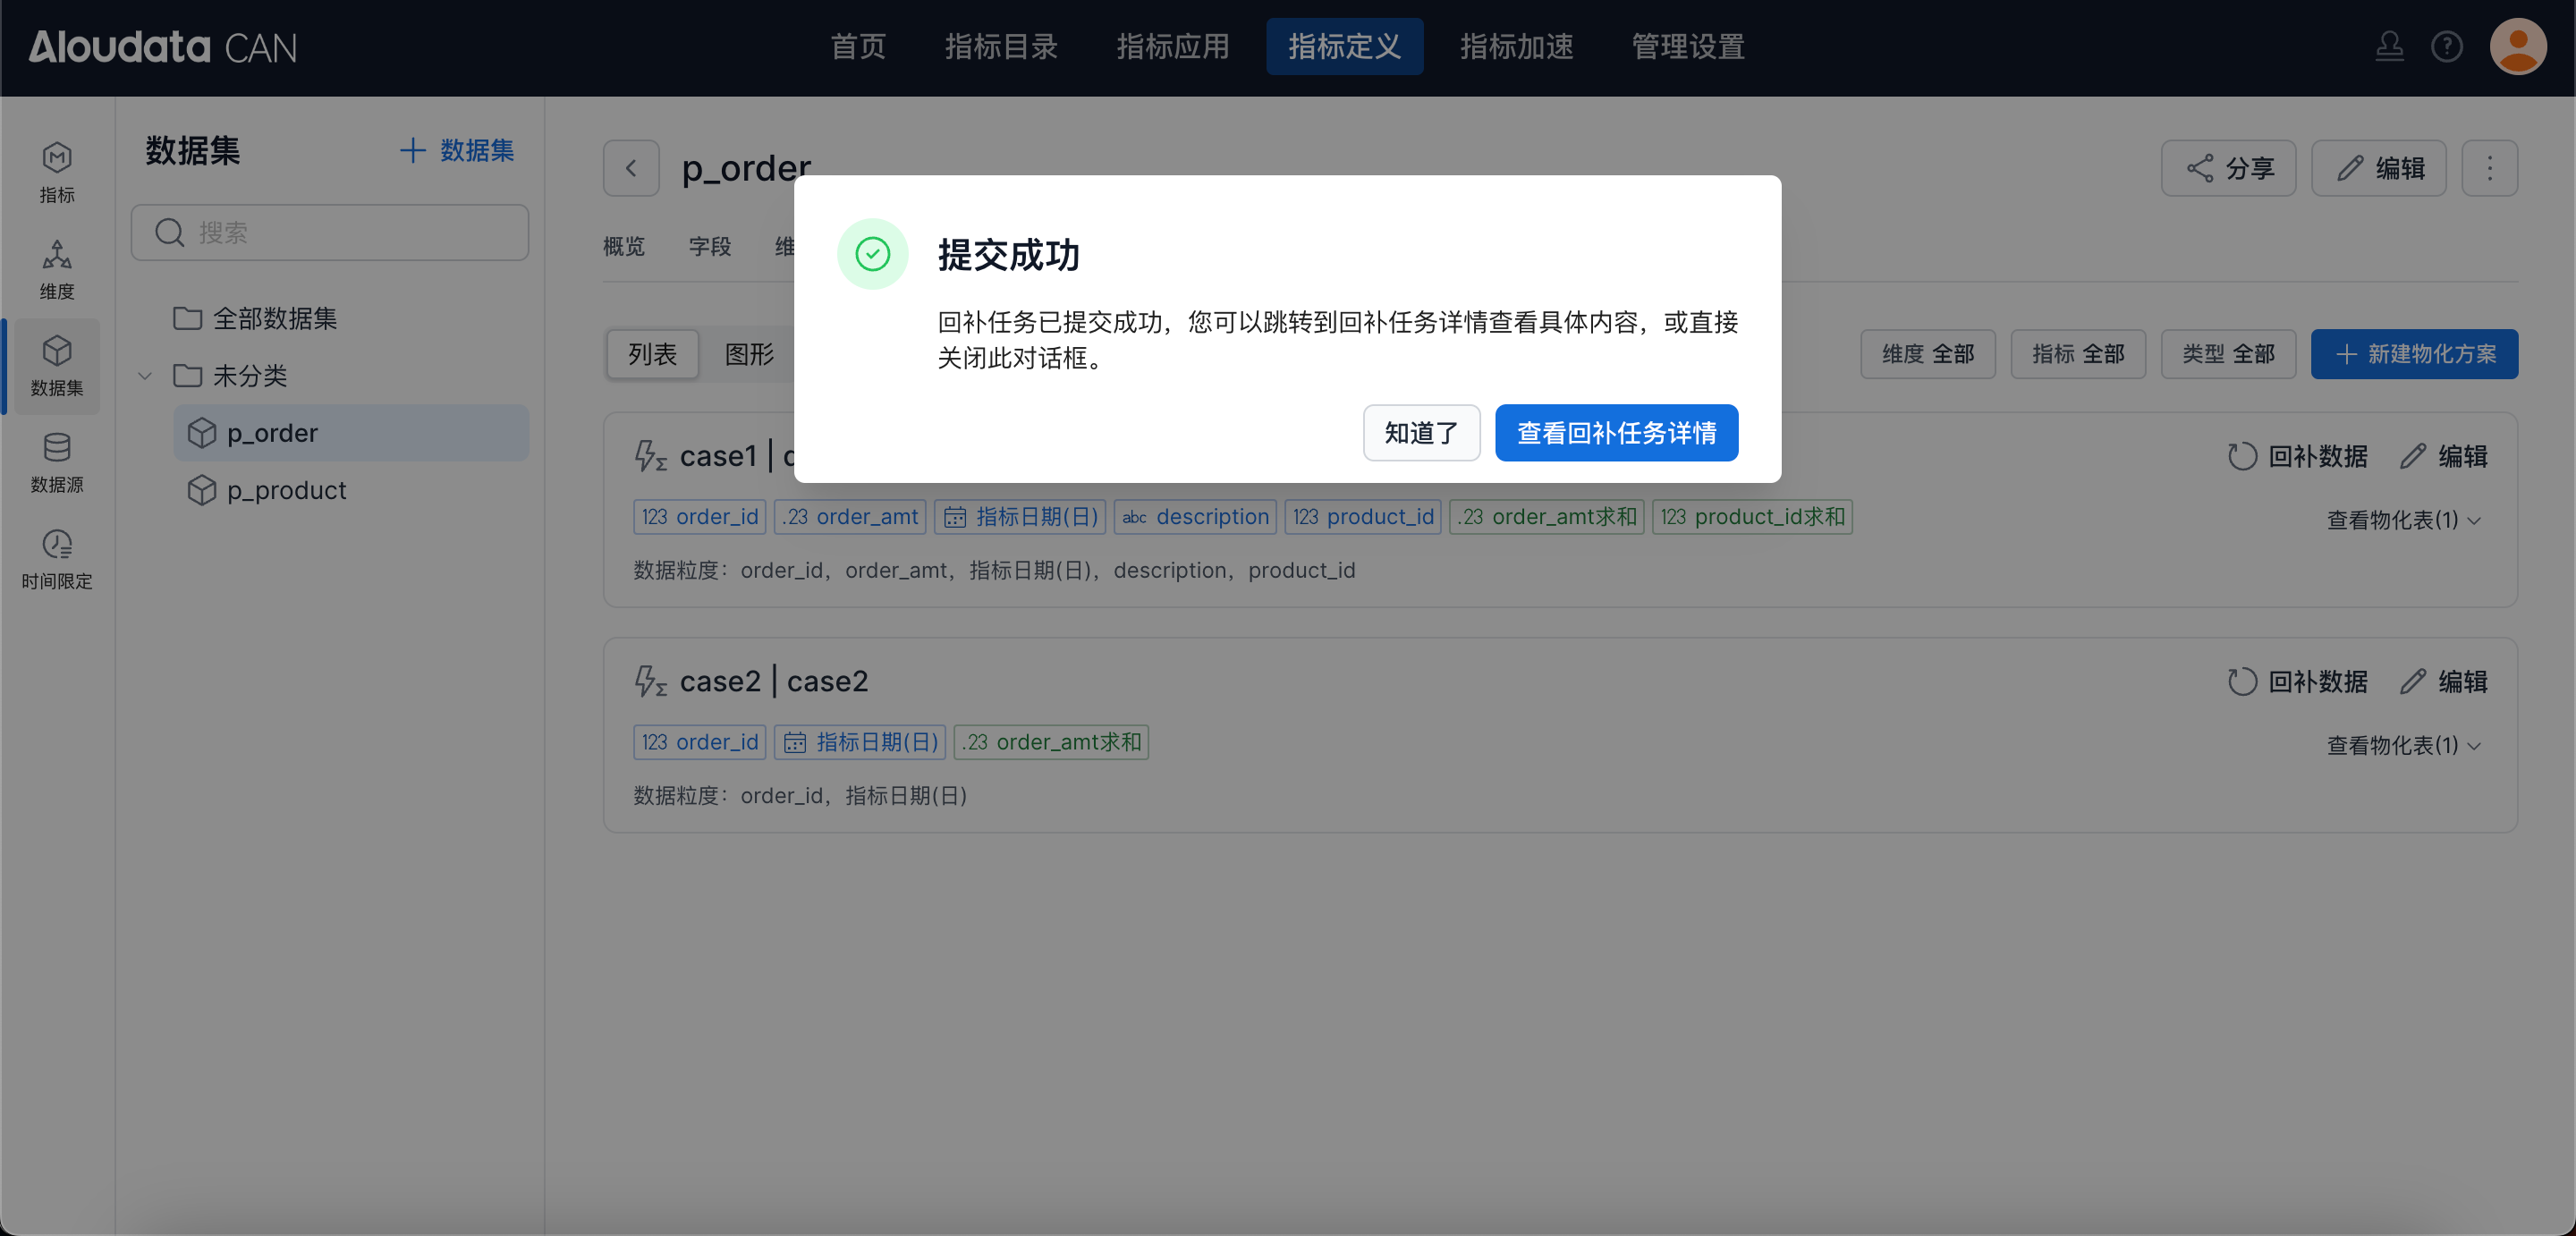
Confirm Submission
After you click OK to backfill data, a dialog shows the submission status of the current task. You can click “Got it” to close the dialog, or click Backfill Task Details to go to the backfill-data details page.